Are you looking to disable WordPress updates? The majority of users have updates enabled on their website but sometimes it can hurt your site. It is found that updating WordPress core, plugins, and themes can break your site, and you can lose your site data. So, what’s the solution? Simply turn off the WordPress automatic updates.
However, turning off the automatic updates in WordPress is not recommended because it is an essential security feature offered by WordPress to all webmasters.
In this guide, learn how to disable WordPress updates with simple steps. Today, you will learn how to turn off the updates manually and use plugins.
So, let’s get started…
Why Does WordPress Update Automatically?
WordPress updates itself automatically because of many security reasons. Not only does WordPress update the core platform but sometimes, it also updates the theme or plugin to keep your site safe from potential threats.
For example, there are multiple critical vulnerabilities that occur on WordPress, and to resolve this, you need to update its core, plugin, and theme. Also, if that theme or plugin is used by lots of WordPress blogs, then the core team sometimes performs an automatic update for that.
Why Disable Automatic WordPress Updates?
Friendly speaking, it’s not recommended to disable the WordPress automatic update, and also most users keep it enabled to receive every new feature with new updates. However, there are some cases where an update can break your site or affect its functionality leading to business and customer loss. Hence, in these situations, disabling WordPress updates can be beneficial for you.
Also, it is a good idea to turn off updates because sometimes you have several plugins or themes installed that are built for specific WordPress versions, or they rely on some other plugin, and a single update can cause compatibility problems with the others.
Another major issue faced by webmasters with updates is unwanted or changed features. For example, when the WordPress Gutenberg editor launched, many WordPress users experienced issues in their workflow, even after too many advance notifications. Similarly, a plugin or theme update can cause many issues in your workflow.
In the end, if you are confident enough to manage WordPress updates manually, then you are ready to disable WordPress updates.
Disabling WordPress Updates: Pros and Cons
Before moving ahead to learn how to turn off updates in WordPress, it’s important to know that disabling WordPress updates comes with both advantages and disadvantages.
Let’s know some of the pros and cons of disabling updates in WordPress.
- Pros of Disabling WordPress Updates
If you control your themes and plugin updates, then you will have excellent control over your website changes. By turning off updates, you will make sure that your site won’t get errors like compatibility errors.
- Cons of Disabling WordPress Updates
Most users forget to update their plugins and themes and even WordPress versions, so disabling WordPress updates can not be a good option for users like this.
If there are some critical bugs in the WordPress core plugin or theme, then you have to manually update them. Assume, that if you are busy with some other work, then your site will get stuck in the bugs until you update things. If you have tons of websites, then you have to invest a lot of your time doing manual updates.
Also, if you disable WordPress updates, you may miss some important and essential security updates.
How to Disable WordPress Updates Using Plugin
If you don’t want to get into any coding or programming, disabling WordPress updates using plugins is the perfect solution for you. Also, it is recommended that all users use this method.
Here, you just need to install a good plugin and configure it as you need. So, without any further delay, let’s start our guide on how to turn off updates in WordPress through the plugin.
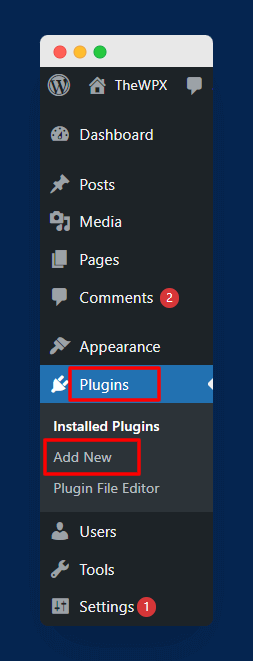
First, open your WordPress dashboard and go to Plugins > Add New. There are plenty of plugins available to help you manage WordPress updates but we highly recommend you use “Easy Updates Manager“.
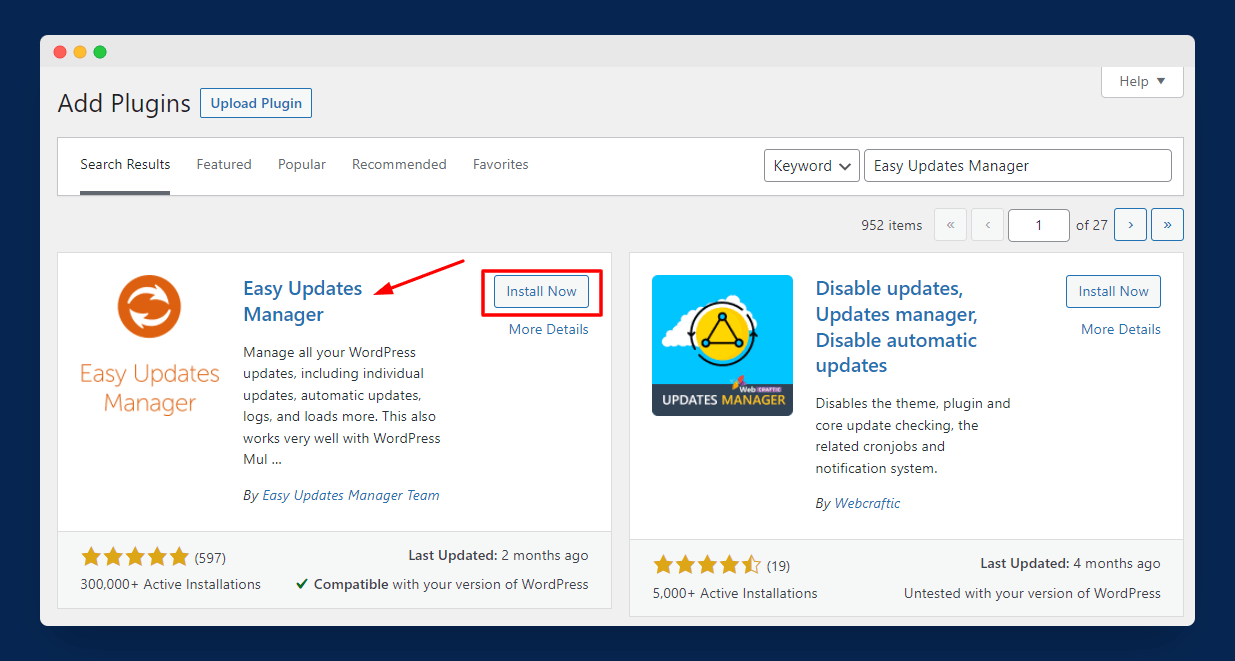
Simply search for Easy Updates Manager in the available search field and you will see the plugin details. Here, click on the Install button and activate the plugin.
After installing and activating the Easy Updates Manager plugin, you are enabled to manage updates of your complete WordPress site. This includes plugins, themes, and core updates.
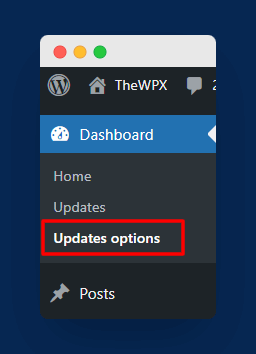
Now, the next step is to configure the plugin settings and options. To start configuring, go to Dashboard > Updates Options available in the sidebar.
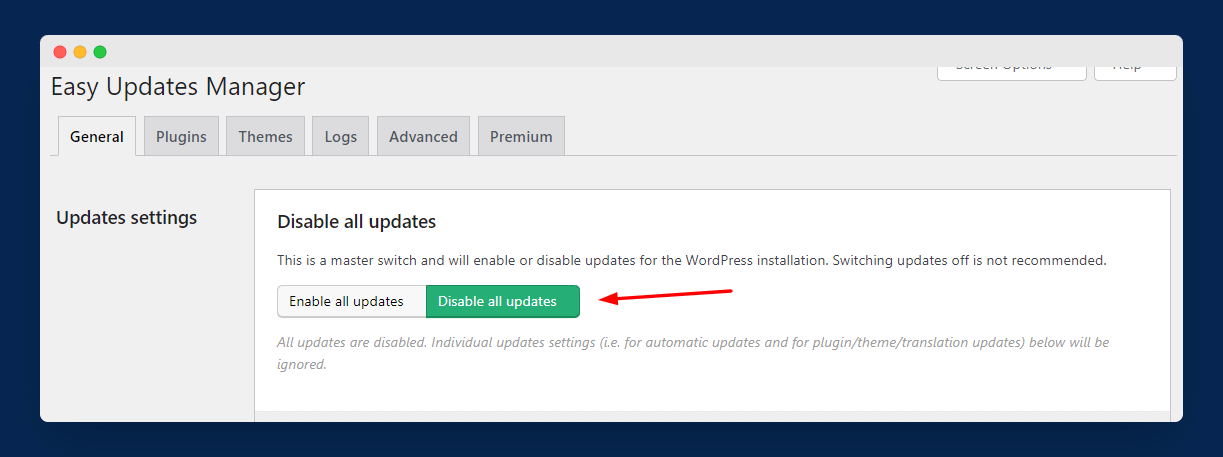
The first setting you will see under the General tab is to disable all updates. You can turn on this setting to disable every single update from your WordPress site.
On the same screen, you also get the option to disable WordPress core updates, plugin updates, and theme updates. You can even turn off the translation updates.
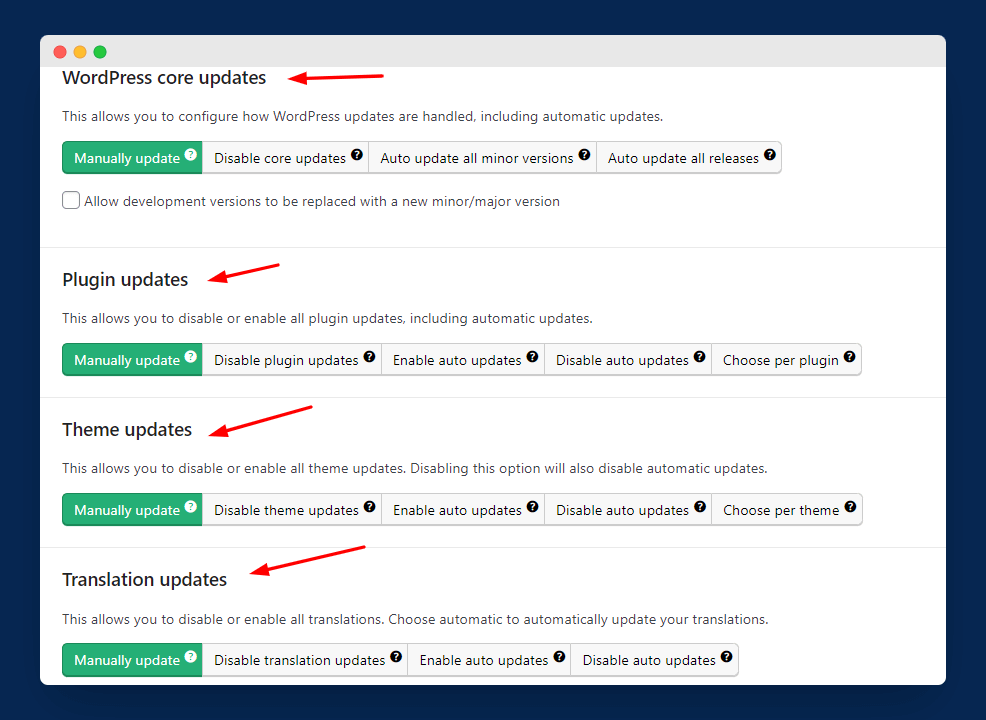
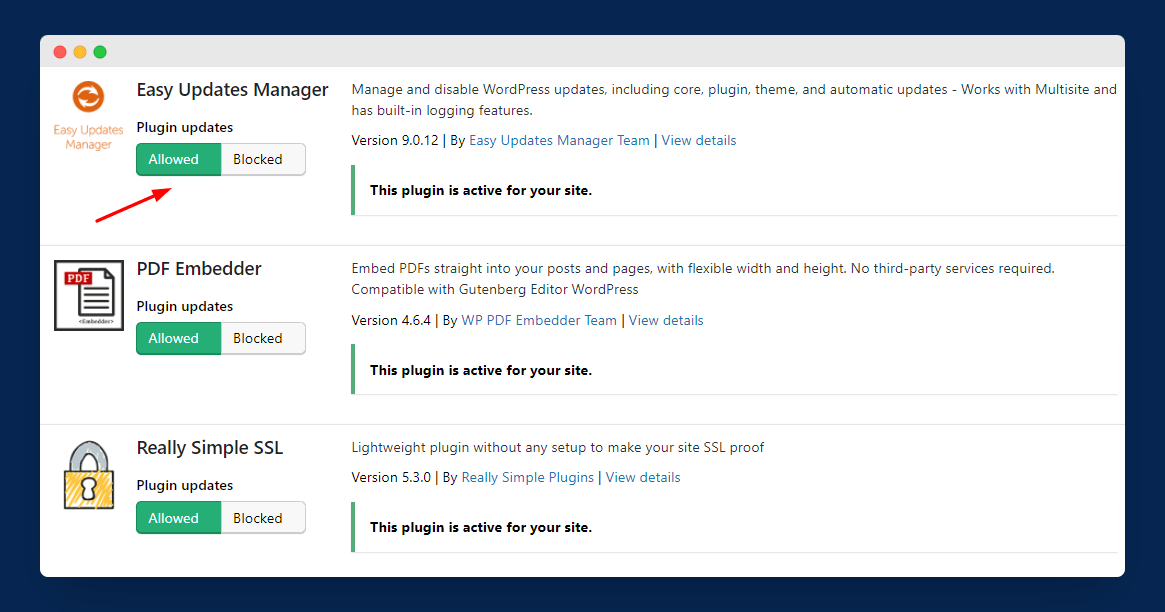
You can also go deeper into the deeper settings of plugins or themes. Simply, go to the Plugins tab and disable individual plugin updates.
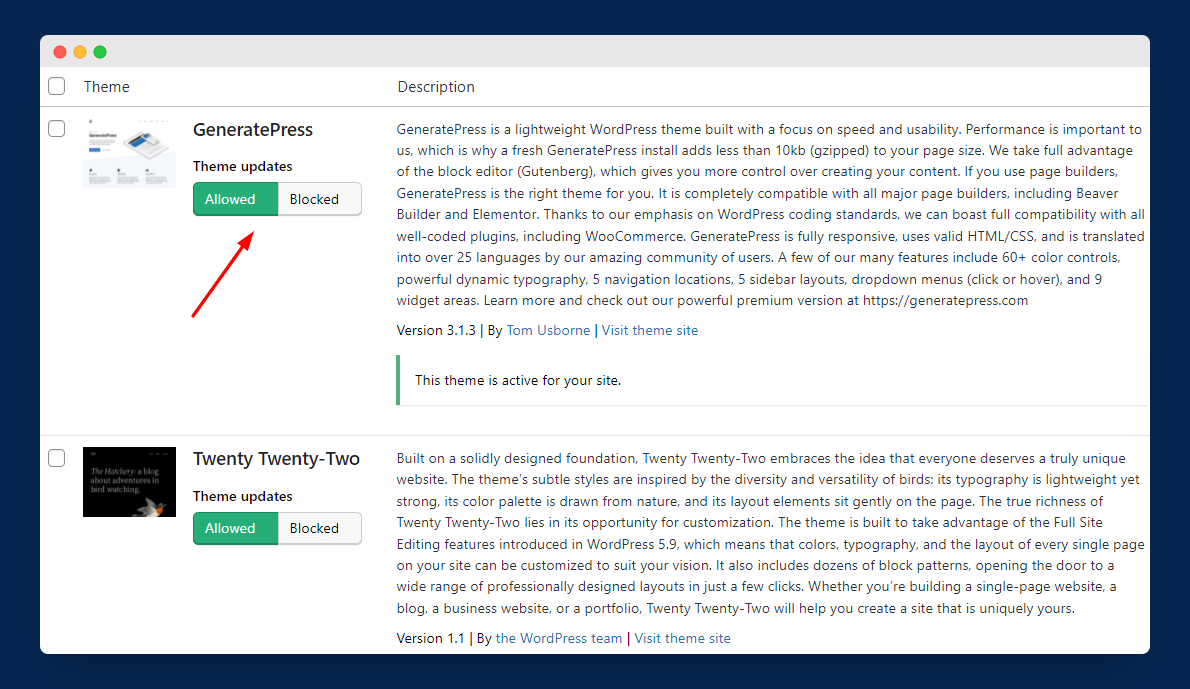
Similarly, go to Themes to disable specific theme updates. You can also turn off updates in bulk.
How to Disable WordPress Updates Manually (Without Plugin)
Are you a person who doesn’t like to use the WordPress plugin for every single problem? If yes, then you can also disable the updates manually. In this method, you have to add several code snippets to your site files.
To get started, first log in to your web hosting cPanel and open the File Manager to access your website’s backend files. You can also use FTP software like FileZilla to access the files.
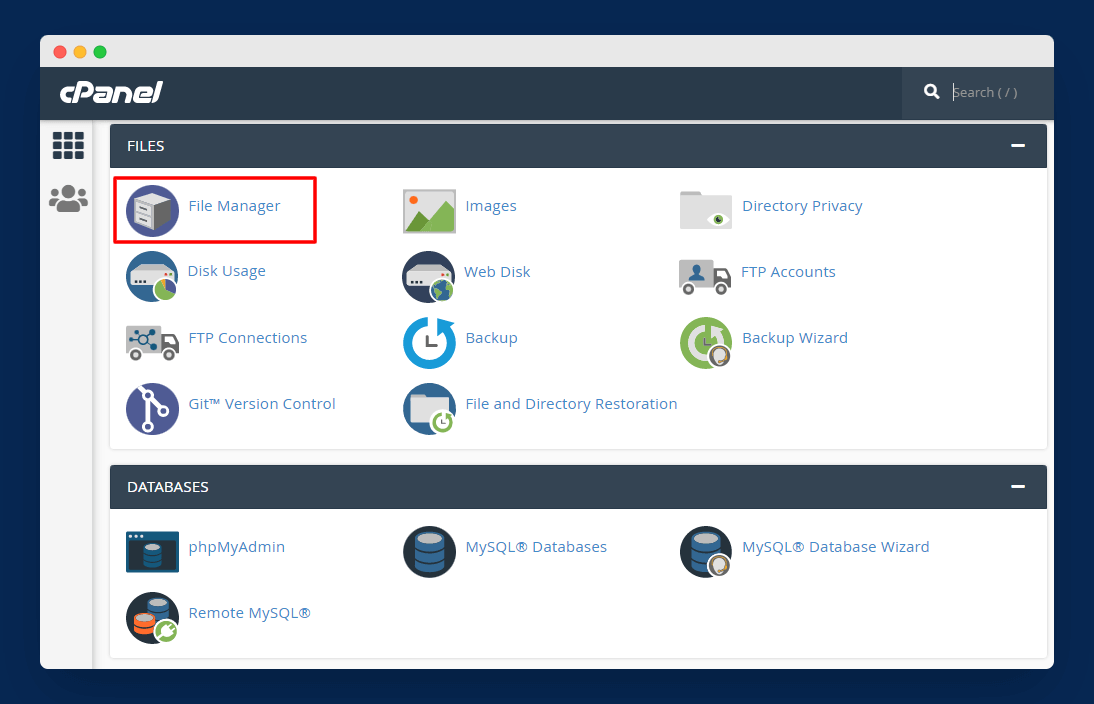
Here, you need to go to open the public_html folder and find wp-config.php. Now, right-click your mouse on the wp-config.php file and click the Edit option.
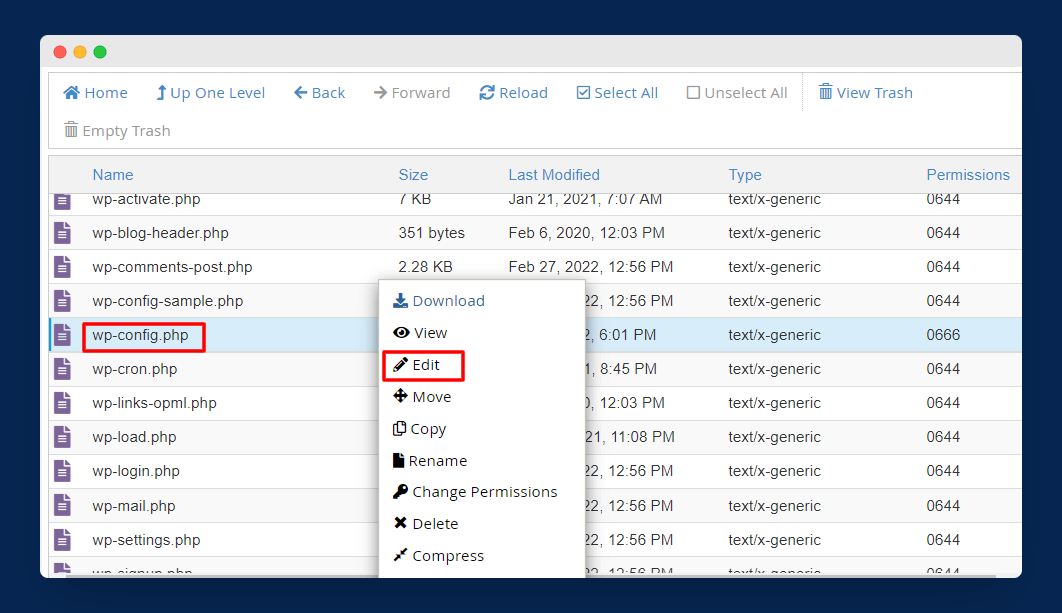
You will be redirected to a new page where you can edit the wp-config.php file. In this file, simply enter the below code to disable WordPress updates:
define( 'WP_AUTO_UPDATE_CORE', false );
Once you added the above code to the file, click on the Save Changes button to save the changes.
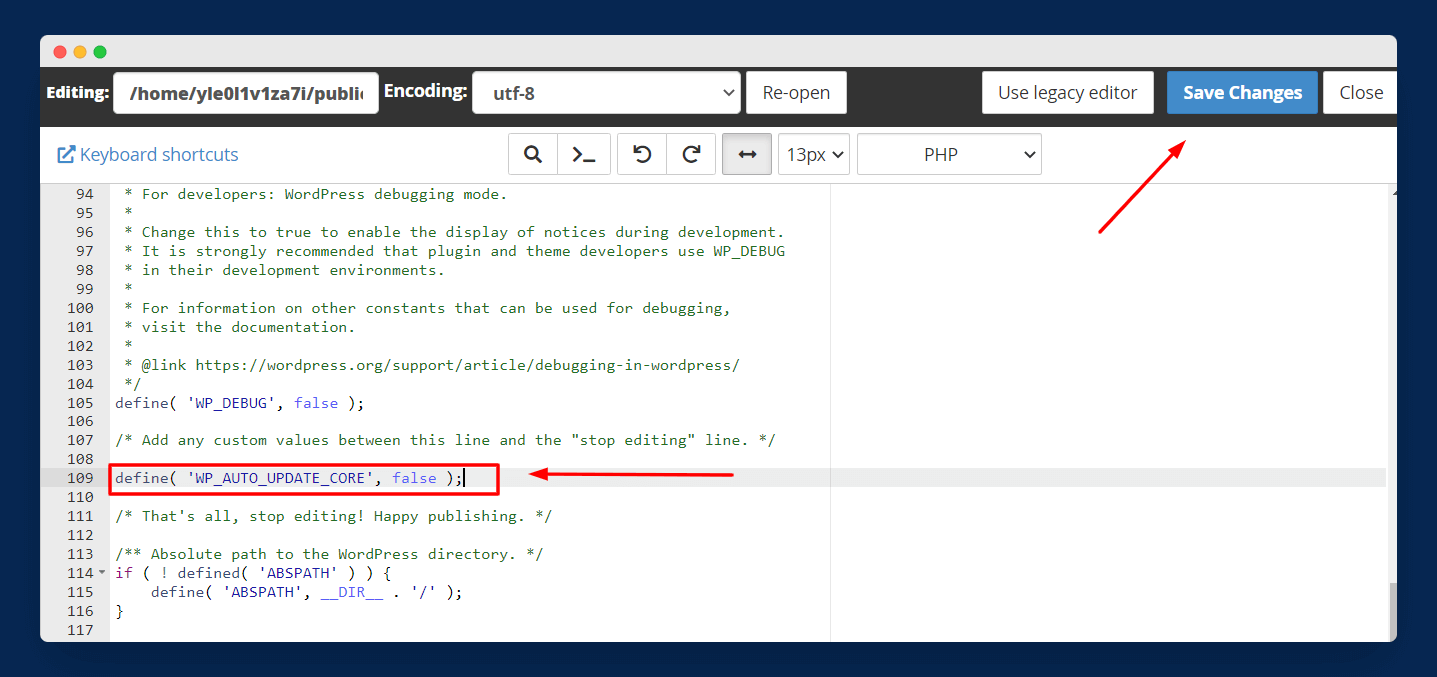
Voila! You can successfully turn off the WordPress automatic updates without using any plugin. However, this process only disables core WordPress updates. So, if you want to disable themes and plugin updates, please proceed with the process below.
You have to open your theme’s functions.php file by navigating to Appearance > Theme File Editor. Here, you can find the functions.php file of your theme.
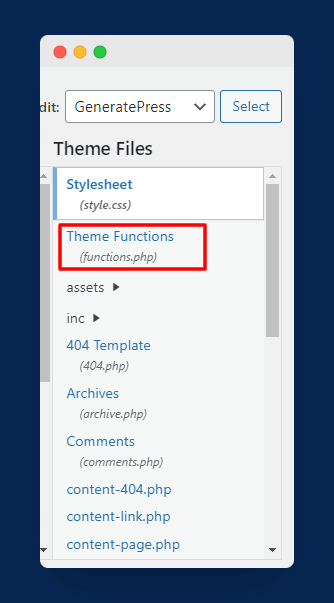
After opening the file, simply paste the below code at the end of the file:
To turn off plugin updates, use this code:
add_filter( 'auto_update_plugin', '__return_false' );
To turn off theme updates, use this code:
add_filter( 'auto_update_theme', '__return_false' );
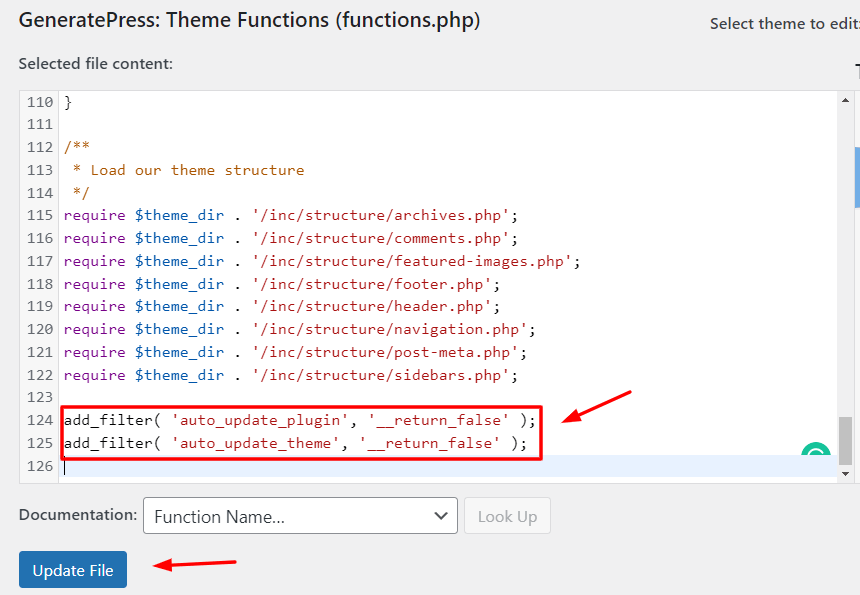
Once you save the file changes, the plugins and theme updates will be turned off.
Wrapping Up
Even if you come to this guide to learn how to disable WordPress updates, it doesn’t mean keeping the updates off is bad. Also, hackers are always seeking to find older versions of WordPress websites to hack them.
As I said earlier, updates can make or break your website, it’s totally up to you whether you want to turn off WordPress updates or not. Also, it totally depends on your needs, for example, for beginners, WordPress updates are harmless but for a big site like an ecommerce store, it’s good to disable updates to lower the chances of site break.
Are you going to disable the updates from your WordPress site or not? Do let us know your thoughts in the comment section below. If this guide solved your problem, then please share it with other WordPress users.
Your article gives a comprehensive understanding of WordPress updates. It’s well-detailed and helps decide whether to disable the updates or not. The manual steps and plugin method are particularly helpful. Great read!
A great guide on managing WordPress updates! I agree that automatic updates can sometimes disrupt the functionality of a site while ensuring security. Disabling them gives control but also requires manual management. A good read for all webmasters!
A very comprehensive guide! It was great to learn about the pros and cons of disabling WordPress updates. This will be useful for many site owners dealing with update issues.
After reading through your guide on how to disable WordPress updates, I am relieved! Your steps were very easy to understand and apply, making the whole process stress-free. I have now successfully disabled my automatic updates.