
If you’re still using the default yoursite.com/wp-admin login URL, you’re making it easy for hackers and bots to find your login page. Changing this URL is one of the simplest security steps you can take on any WordPress site.
In this guide, I’ll show you how to change your WordPress login URL using plugins and manual methods, plus the essential security measures you should pair with this change.
Why Should You Change Your WordPress Login URL?
Every WordPress site ships with the same default login URLs: /wp-admin and /wp-login.php. Hackers and automated bots know this, which makes your login page a constant target for brute-force attacks – where bots try thousands of username and password combinations to break in.
These attacks slow down your website, consume server resources, and can eventually crack weak passwords. By changing your login URL to something unique, most bots will hit a 404 error and move on.
Keep in mind: Changing your login URL is “security through obscurity.” It blocks automated bots effectively, but a determined attacker targeting your site specifically can still find your custom URL. That’s why you should combine this with other security measures covered later in this guide.
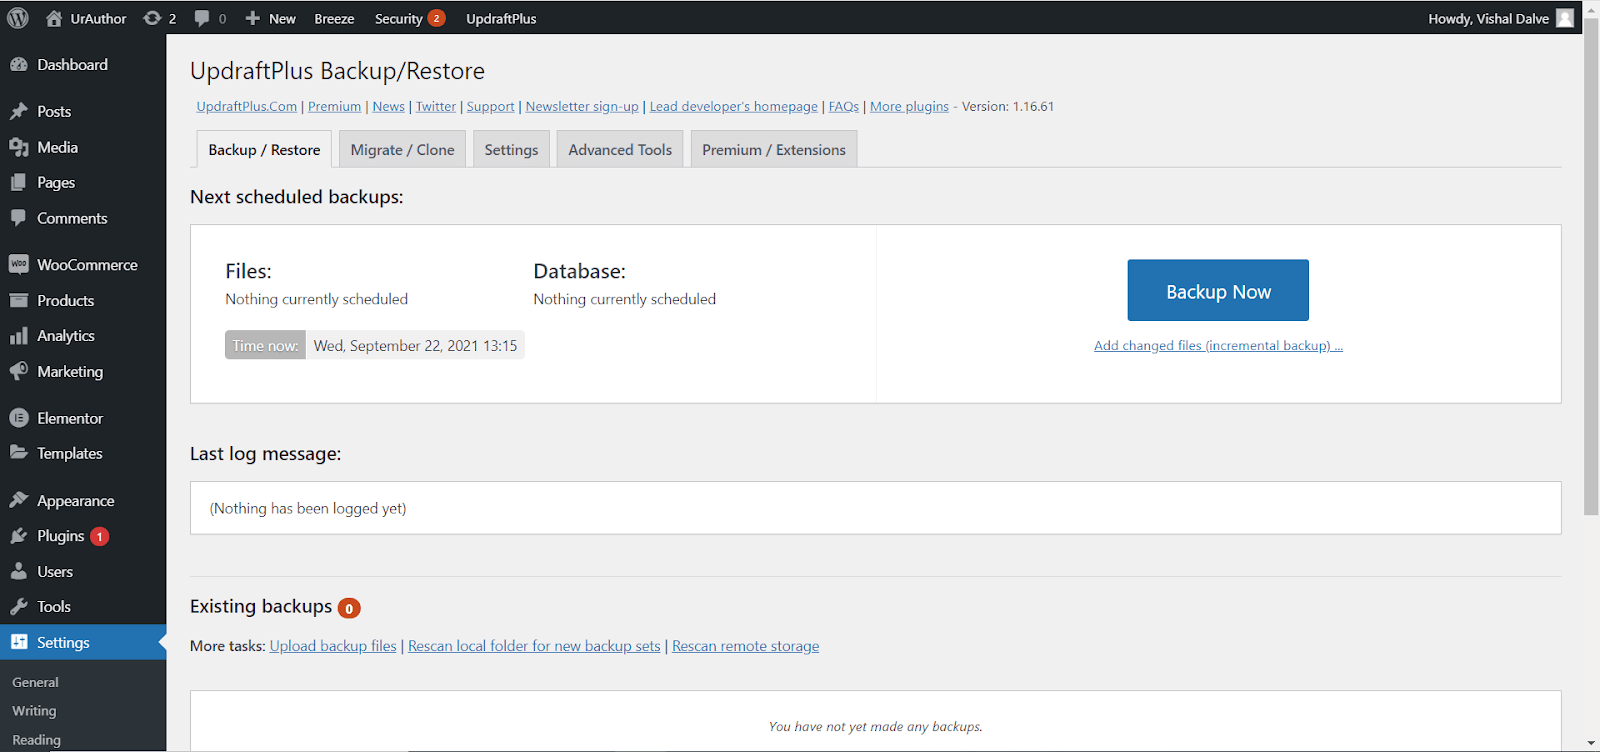
Back Up Your Website First
Before making any changes, take a complete backup. Install the UpdraftPlus plugin from Plugins >> Add New, configure your preferred remote storage (Google Drive, Dropbox, etc.), and click Backup Now.
How to Change WordPress Login URL Using WPS Hide Login Plugin
WPS Hide Login is a lightweight, free plugin with over 1 million active installations. It’s the easiest and most popular way to change your login URL.
Here’s what you need to do:
Step 1: Log in to your WordPress dashboard, go to Plugins >> Add New, and search for “WPS Hide Login.”

Step 2: Click Install Now and then Activate the plugin.
Step 3: Go to Settings >> General and scroll to the bottom. You’ll see two new fields:
- Login URL: Enter your custom login slug (e.g.,
my-secret-login) - Redirection URL: Where visitors go when they hit the old
/wp-adminURL (typically a 404 page)
Step 4: Click Save Changes. Your login page is now at yoursite.com/my-secret-login.
Pro Tip: Avoid common slugs like “/login” or “/admin-login” since bots already try these. Use something unique like a random alphanumeric string.
Best Plugins to Change WordPress Login URL
WPS Hide Login is my go-to, but here are other solid options that bundle login URL changes with broader security features:
1. Solid Security (Formerly iThemes Security)
A comprehensive security plugin now maintained by SolidWP. Beyond changing your login URL, it offers two-factor authentication, brute force protection, file change detection, magic links, and passkeys support (Pro). If you go with their paid plan, you won’t need a separate login URL plugin.
2. Hide My WP Ghost
Goes beyond login URL changes by hiding all common WordPress paths (wp-content, wp-includes, etc.). Protects against SQL injection, XML-RPC attacks, and script injection. Compatible with WP Multisite, Apache, LiteSpeed, Nginx, and IIS.
3. All In One WP Security & Firewall
A full security suite that includes login URL changes, password strength analysis, user enumeration prevention, IP blocking, and PHP file editing protection. Detects accounts using the default “admin” username and prompts you to change it.
How to Change WordPress Login URL by Editing Core Files
If you prefer not to use plugins, you can change the login URL manually. I only recommend this if you’re comfortable with FTP or your hosting file manager.
Important: Manual changes to core WordPress files get overwritten with every WordPress update. You’ll need to re-apply them each time. For most users, the plugin method is safer.
Method 1: Changing the .htaccess File
This works on Apache servers only. Connect to your site via FTP or File Manager, navigate to the WordPress root directory, and open the .htaccess file. Add this code at the bottom:
RewriteRule ^my-custom-login$ https://yoursite.com/wp-login.php?secret_key=YOUR_SECRET_KEY [NC,L]
RewriteCond %{HTTP_REFERER} !^https://yoursite.com/.*
RewriteRule ^(.*)wp-login\.php(.*)$ https://yoursite.com [L,R=302]
Replace yoursite.com with your domain, my-custom-login with your desired slug, and YOUR_SECRET_KEY with a random alphanumeric string.
Note: This method only works on Apache servers. Nginx or LiteSpeed require server configuration changes that typically need root access.
Method 2: Renaming the wp-login.php File
Step 1: Download wp-login.php from your WordPress root directory as a backup.
Step 2: Open it in a text editor, use Find & Replace to change all instances of wp-login to your custom slug (e.g., custom-login).
Step 3: Rename the file to custom-login.php and upload it back to your root directory.
Your login page will now be at yoursite.com/custom-login.php. Remember, this gets overwritten with every WordPress core update.
Essential Security Measures Beyond Changing Your Login URL
Changing your login URL alone isn’t enough. Combine it with these measures for proper protection:
- Enable Two-Factor Authentication (2FA): Adds a second verification step using apps like Google Authenticator. Even if someone cracks your password, they can’t get in without the 2FA code.
- Limit Login Attempts: Block IPs that fail too many login attempts. This is one of the most effective brute-force defenses.
- Use Strong Passwords: Use a password manager to generate passwords that are at least 16 characters with mixed case, numbers, and symbols.
- Add CAPTCHA to Login: Stops automated bots from submitting login attempts even if they find your custom URL.
- Keep Everything Updated: Most WordPress hacks exploit known vulnerabilities in outdated plugins, themes, or core files. Update regularly.
How to Go Back to the Original WordPress Login URL
If something goes wrong or you forget your custom URL, reverting is straightforward. Connect via FTP or your hosting File Manager, navigate to /wp-content/plugins/, and delete or rename the login URL plugin folder (e.g., wps-hide-login). Your login will immediately revert to the default /wp-admin.
If you edited core files instead, remove the redirect rules from .htaccess, or re-upload the original wp-login.php from a fresh WordPress download at wordpress.org/download.
Risks to Be Aware Of
- Plugin Conflicts: Membership or e-commerce plugins that interact with the login process may conflict with custom login URL plugins. Check compatibility before activating.
- Forgetting Your New URL: Bookmark the new login page immediately and store it in your password manager. Share it with team members who need access.
- Caching Issues: Clear your cache after changing the login URL. Exclude the new URL from caching to prevent redirect loops.
Summing Up!
Use WPS Hide Login for a quick, free setup. Pair it with a security plugin like Solid Security for 2FA and brute force protection. And remember – a custom login URL is just one layer of your security strategy, not the whole thing.
Have questions or a method that worked well for you? Drop a comment below!