
TL;DR: Open Google Docs, create a blank document, set page size to 6″ × 9″ (or Letter), adjust margins to 1″, pick Times New Roman at 12pt, add your title page, set up headers/footers with page numbers, and insert a table of contents. The whole setup takes under 10 minutes, and you can reuse the same template for every book you write.
I’ve formatted multiple ebooks and manuscripts in Google Docs over the past few years. No expensive software like Scrivener or InDesign — just a free Google account and about 10 minutes of setup time.
The first time I tried writing a book in Google Docs, I wasted hours figuring out margins, page sizes, and chapter formatting. So I built a reusable book template that I still use today.
Here’s the exact step-by-step process. If you’re a beginner writer looking to work efficiently in Google Docs, this will save you a ton of time.
Why Use Google Docs for Your Book Template?
Google Docs doesn’t have a dedicated “book template” in its template gallery. But creating one from scratch is straightforward, and there are solid reasons to use it over paid tools:
- 100% free — no subscriptions, no hidden costs, ever
- Real-time collaboration — share with editors or co-authors and work on the same document simultaneously
- Cloud-based with 15 GB free storage — access your manuscript from any device, anywhere
- Easy export — download as PDF, DOCX, or EPUB for publishing on platforms like Amazon KDP
- Auto-saving and version history — never lose a draft again
I’ve tried Scrivener and Google Docs for book projects. For most beginner writers, Google Docs gets the job done without the learning curve. You can always move to specialized software later if needed.
How to Create a Book Template in Google Docs (Step by Step)
As of February 2026, these steps work on the latest version of Google Docs. I’ve tested each one personally.
Step 1: Create a Blank Document
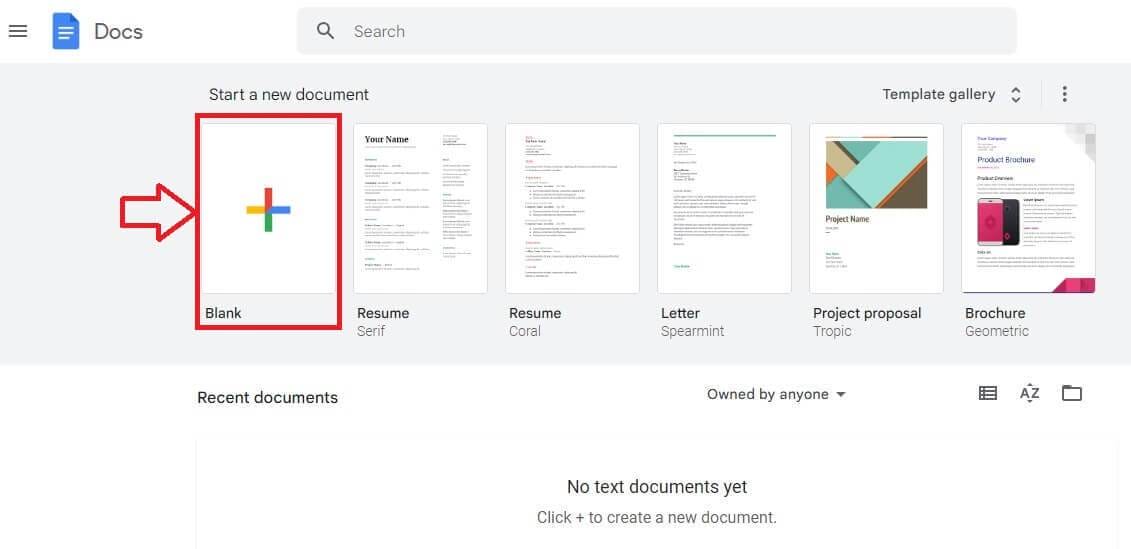
Head to docs.google.com and click Blank to create a new document.
You’ll see a Template Gallery button at the top with premade templates for resumes, letters, and brochures. None are designed specifically for books, so we’re building our own.
Step 2: Set Up Your Page Size and Margins
Go to File → Page setup.
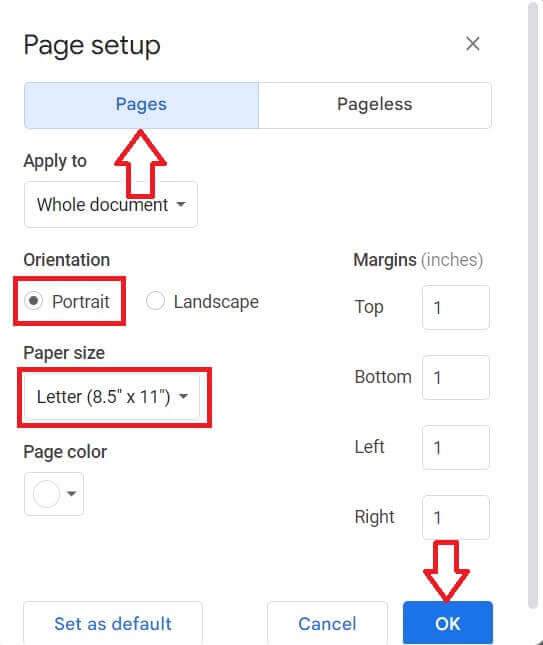
Here’s what to configure:
- Orientation: Portrait
- Paper size: Letter (8.5 x 11 inches) for ebooks/manuscripts, or set a custom size of 6 x 9 inches for print books (the most popular Amazon KDP trim size)
- Margins: 1 inch on all sides — or 1.25 inches on the left/inside if you’re printing with binding
Click OK to apply.
Pro tip: If you’re self-publishing on Amazon KDP, set the custom page size to 6 x 9 inches from the start. This way your formatting matches the final print layout and you won’t need to reformat later.
Step 3: Choose Your Font and Size
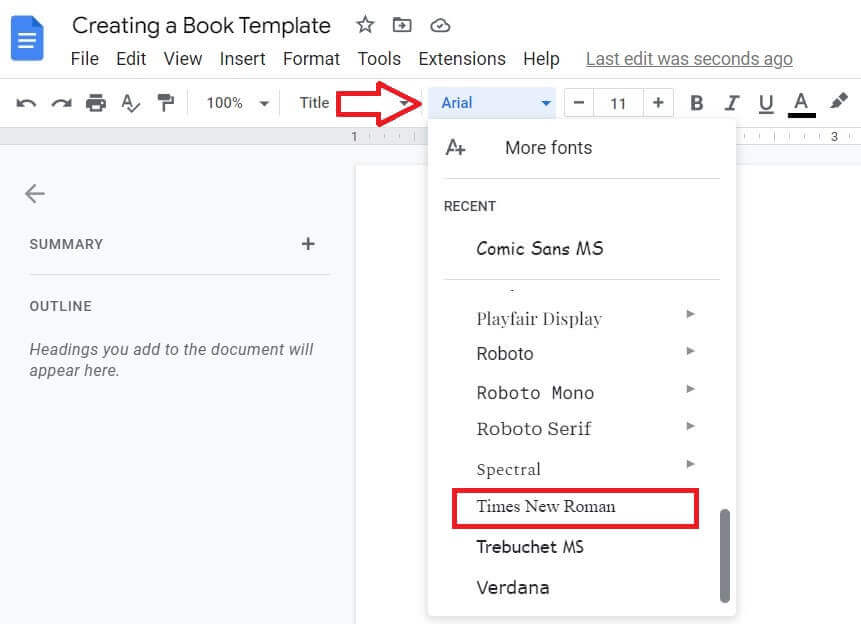
Click the font dropdown (default is Arial) and switch to a serif font. The industry standards for books are:
- Times New Roman — the classic, universally accepted choice
- Garamond — slightly more elegant, popular in fiction
- Georgia — excellent readability on screens and in print

Set body text to 12pt. For longer manuscripts (80,000+ words), 11pt keeps the page count manageable.
Then go to Format → Line & paragraph spacing and set line spacing to 1.5 for general writing or 2.0 (double-spaced) if you’re submitting to a publisher or literary agent.
Step 4: Create Your Title Page
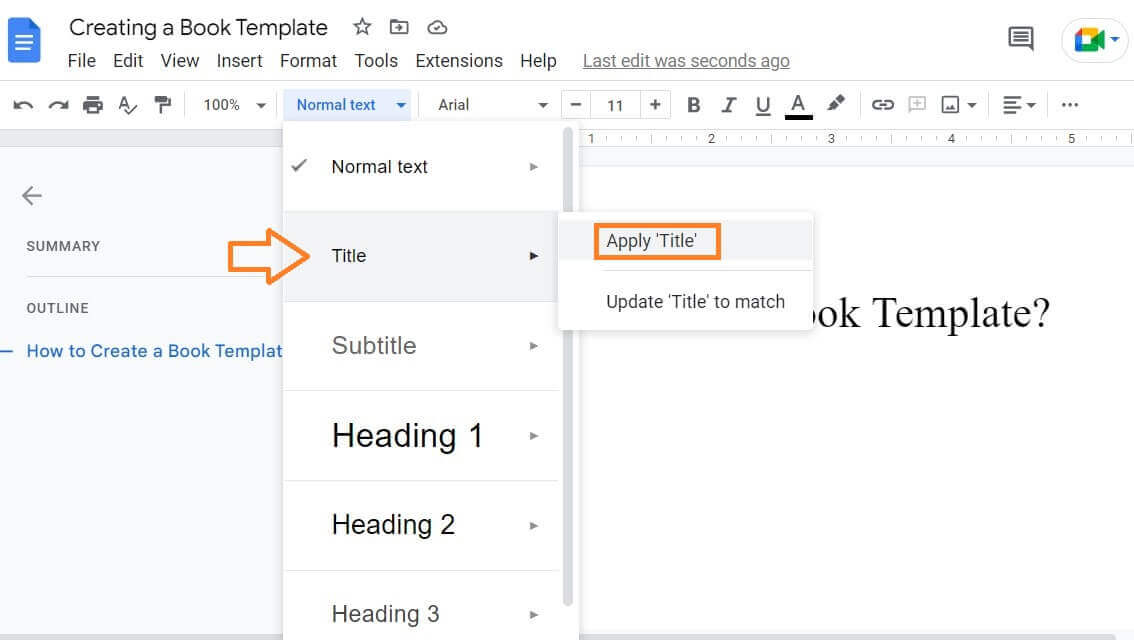
Type your book title at the top of the page. Select the text, click the Normal text dropdown in the toolbar, and change it to Title.
Below the title, add your author name. Center-align both using the alignment option in the toolbar.
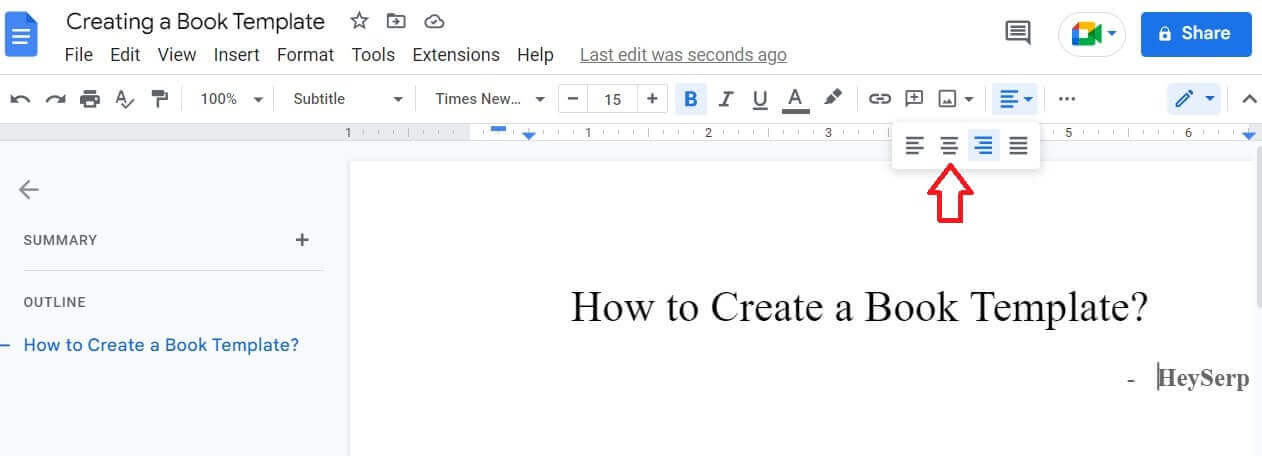
Your title automatically appears in the document outline (left sidebar), which helps with navigation as your book grows longer.
Step 5: Add Headers, Footers, and Page Numbers
Go to Insert → Headers & footers → Header.
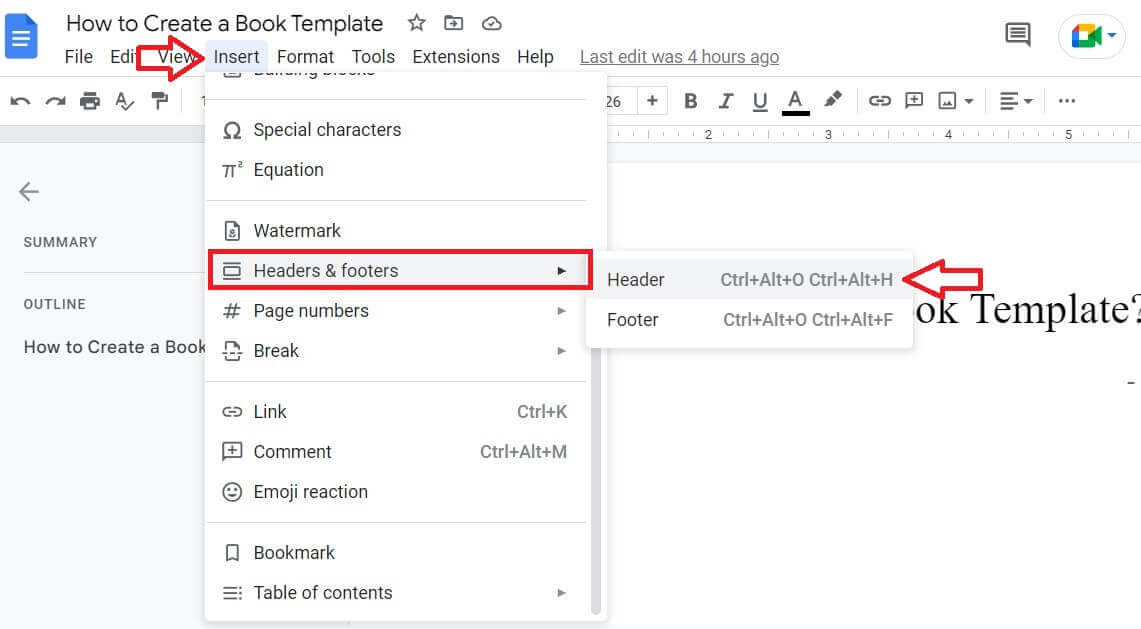
Type your book title or chapter name in the header area. Check “Different first page” so the title page stays clean.
Keyboard shortcuts: Ctrl + Alt + H for header, Ctrl + Alt + F for footer.
For page numbers, go to Insert → Page numbers and pick a placement — bottom-right is the most common for books.

Step 6: Insert a Table of Contents
First, add a page break after your title page: Insert → Break → Page break.
Then place your cursor on the new page and go to Insert → Table of contents.
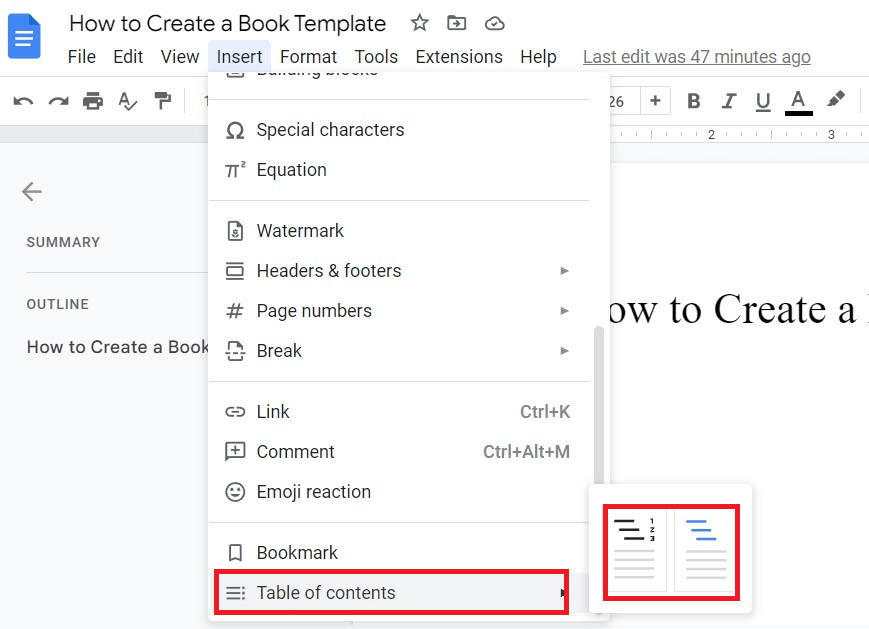
Pick the version with page numbers for a cleaner look. As you add Heading 1, Heading 2, and Heading 3 styles throughout your book, the table of contents updates automatically when you click the refresh icon next to it.
Step 7: Name Your Document and Start Writing
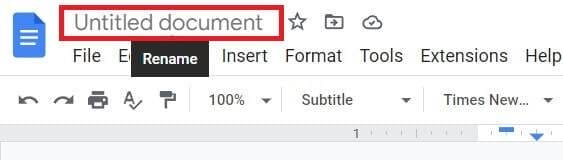
Click “Untitled document” at the top-left corner and type your book’s title. Google Docs auto-saves everything to your Google Drive, so you’ll never lose your work.
Your template is done. For future books, go to File → Make a copy and you’ll have a fresh template without redoing any of this setup.
Quick tip: Once you finish your book, you can easily save any images from Google Docs for use in your cover design or marketing materials.
Quick Reference: Recommended Book Template Settings
Here’s a cheat sheet I keep handy for setting up new book templates:
| Setting | Ebook / Manuscript | Print Book (Amazon KDP) |
|---|---|---|
| Page size | Letter (8.5 x 11 inches) | 6 x 9 inches (custom) |
| Margins | 1 inch all sides | 1 inch top/bottom, 1.25 inch inside, 0.75 inch outside |
| Font | Times New Roman or Georgia | Garamond or Times New Roman |
| Font size | 12pt | 11 – 12pt |
| Line spacing | 2.0 (double-spaced) | 1.15 – 1.5 |
| Orientation | Portrait | Portrait |
These settings cover the vast majority of use cases. Adjust based on your specific publisher’s requirements or the platform you’re publishing on. If you’re planning to use Google Docs as part of your broader workflow, check out these digital marketing tools that pair well with content creation.
Frequently Asked Questions
Does Google Docs have a built-in book template?
No. Google Docs has templates for resumes, letters, and proposals, but not books. You need to create your own from a blank document using the steps in this guide. The entire setup takes under 10 minutes.
What page size should I use for a book in Google Docs?
For ebooks and manuscripts, use Letter size (8.5 x 11 inches). For print books on Amazon KDP, set a custom page size of 6 x 9 inches — the most popular self-publishing trim size.
Can I export my Google Docs book as a PDF?
Yes. Go to File, then Download, then PDF Document. You can also export as DOCX, EPUB, or plain text depending on your publishing platform’s requirements.
Is Google Docs good enough for writing a full-length book?
For most writers, absolutely. Google Docs handles documents up to 1.5 million characters (roughly 300,000 words). It includes real-time collaboration, auto-saving, and version history. For advanced typesetting or complex layouts, you would export to a dedicated tool like InDesign or Reedsy after writing.
How do I share my book template with a co-author?
Click the blue Share button in the top-right corner of your Google Doc, set permissions (Viewer, Commenter, or Editor), and share the link. Your collaborator can then work on the same document in real time.
Summing Up!
Creating a book template in Google Docs takes about 10 minutes and saves you hours on every future project. Set your page size, pick a serif font, add headers and page numbers, drop in a table of contents, and you’re ready to write.
My recommendation: start with the 6 x 9 inch custom page size if you’re planning to self-publish, or Letter size if you’re writing a manuscript for submission. Use File → Make a copy to reuse the template for every new book without starting from scratch.
If you found this helpful, you might also want to check out how to wrap text in Google Sheets and Google Docs or learn how to save images from Google Docs for your book covers and marketing materials.