
Quick Answer: In Google Sheets, select your cells, click the Text Wrapping icon in the toolbar (curved arrow over text lines), and choose Wrap. In Google Docs, text wrapping applies to images — click any image, select the wrapping icon from the floating toolbar, and pick Wrap Text. Both take under 5 seconds once you know where to look.
Text wrapping works differently in Google Sheets and Google Docs, which confuses a lot of people. In Sheets, it controls how cell content displays when it exceeds the column width. In Docs, it controls how text flows around images and other objects. I use both daily while managing spreadsheets and writing documents, and this guide covers every method for each app — desktop, mobile, and keyboard shortcuts included.
What Are the 3 Text Wrapping Options in Google Sheets?
Google Sheets gives you three text wrapping options. Understanding the difference between them saves you from formatting headaches, especially when working with data-heavy spreadsheets.
| Option | What It Does | Best For |
|---|---|---|
| Overflow (Default) | Text spills into the next empty cell. If the adjacent cell has data, the text gets cut off at the cell border. | Simple sheets with few columns |
| Wrap | Text breaks into multiple lines within the cell. Row height increases automatically to show all content. | Data tables, reports, shared spreadsheets |
| Clip | Text is hidden beyond the cell width. Content still exists — you just cannot see it without clicking the cell. | Dashboard views where uniform row height matters |


The first screenshot above shows the default Overflow behavior — notice how the long text spills past the cell border. The second shows the same cell after applying Wrap — the row height expanded and all text is visible within the cell.
How Do You Wrap Text in Google Sheets Using the Toolbar?
This is the fastest method and the one I use most often. It takes exactly two clicks.
Step 1: Select the cell, row, or column where you want to enable text wrapping. To wrap the entire sheet at once, press Ctrl + A (Windows) or Cmd + A (Mac) to select all cells.
Step 2: In the toolbar, locate the Text Wrapping icon — it looks like a small text block with a curved arrow. If you cannot find it, click the three-dot More button in the toolbar to reveal additional formatting options.
Step 3: Click the Wrap option (the middle icon). The cell height adjusts immediately to display all content.

How Do You Wrap Text Using the Format Menu?
This method works identically to the toolbar approach but uses the menu bar instead. It is useful when the toolbar icon is hidden on a smaller screen or when you are navigating by keyboard.
Step 1: Select the cells you want to wrap.
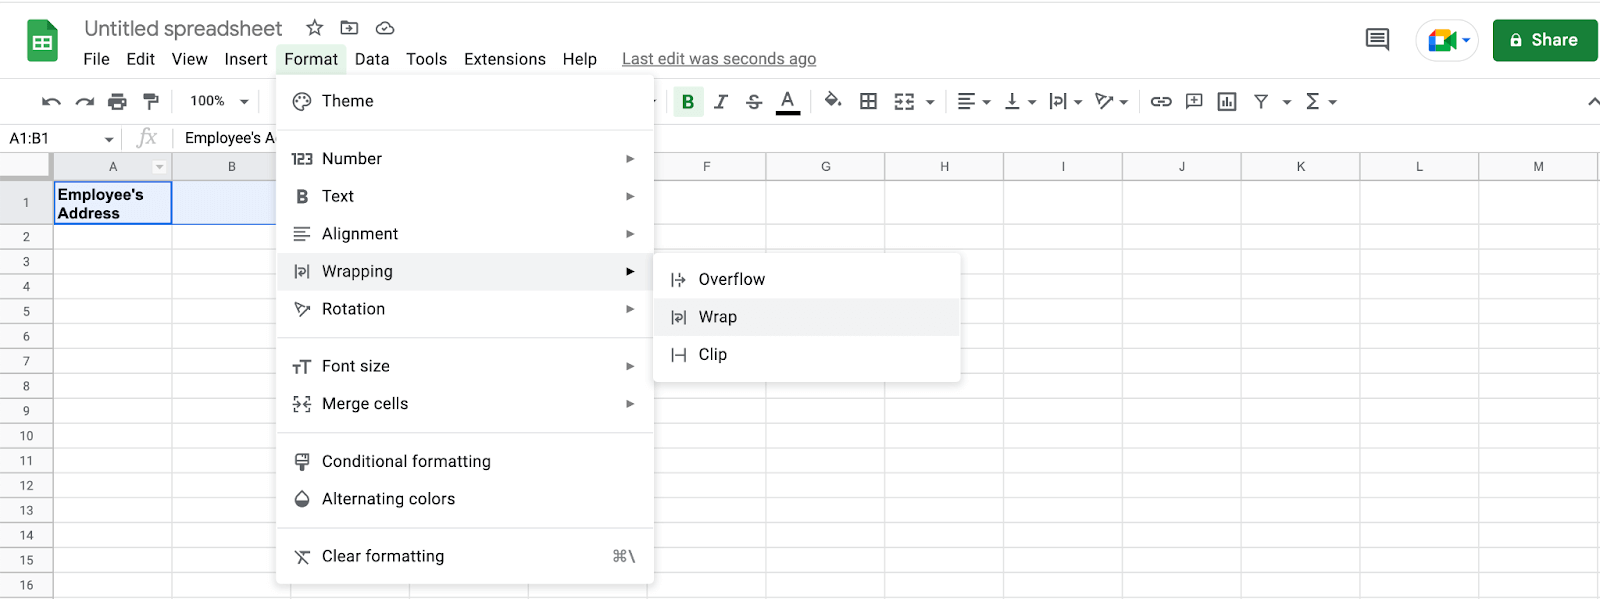
Step 2: Click Format in the menu bar, hover over Wrapping, and select Wrap.
The result is identical to the toolbar method. Both approaches toggle the same setting — use whichever feels more natural to your workflow.
How Do You Wrap Text in Google Sheets on Mobile?
The Google Sheets mobile app supports text wrapping on both Android and iPhone, though the interface is slightly different from desktop.
Step 1: Open your spreadsheet in the Google Sheets app and tap the cell or range you want to wrap.
Step 2: Tap the Format button — it is the icon that looks like the letter A with horizontal lines, located in the top toolbar.
Step 3: Tap the Cell tab, then toggle on Wrap text.
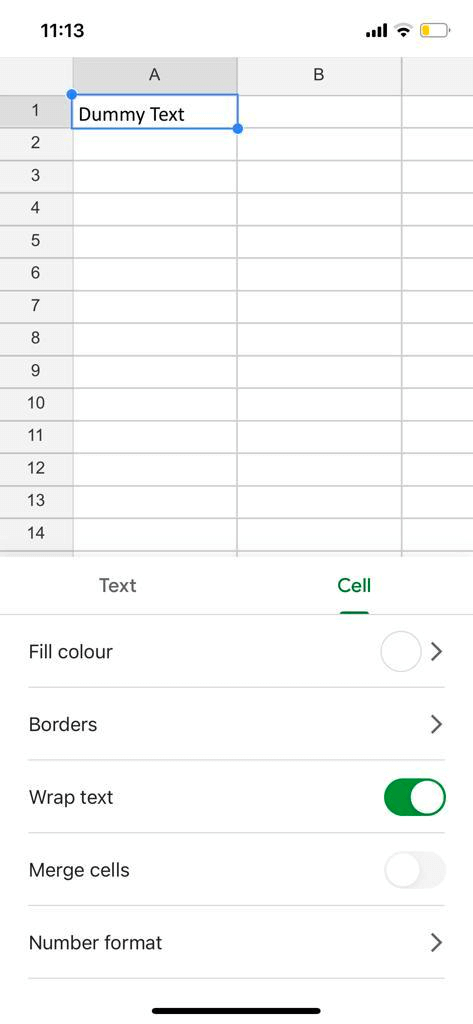
The mobile app does not offer Overflow or Clip separately — it is a simple on/off toggle. When enabled, it behaves identically to the Wrap option on desktop.
How Do You Insert Manual Line Breaks Inside a Cell?
Sometimes you need text to break at a specific point rather than wherever the column width dictates. Google Sheets supports manual line breaks inside any cell.
- Windows: Place your cursor where you want the break and press Alt + Enter.
- Mac: Place your cursor and press Ctrl + Enter (or Command + Enter).
This inserts a hard line break that stays regardless of column width changes. I find it useful for addresses, multi-line labels, or formatted notes inside a single cell.
What Does Text Wrapping Mean in Google Docs?
Text wrapping in Google Docs is a completely different concept from Google Sheets. In Docs, it refers to how text flows around inserted objects — images, drawings, and charts.
By default, Google Docs inserts images in line with text, meaning the image sits on a line like a giant character. This creates awkward vertical gaps and wastes page space. Text wrapping lets you position images beside your text for a polished, professional layout.
As of February 2026, Google Docs offers five wrapping styles:
| Style | What It Does | Best For |
|---|---|---|
| In Line (Default) | Image sits on a text line. No text appears beside it. | Small icons or inline graphics |
| Wrap Text | Text flows around the image on both sides. | Most documents — articles, reports, essays |
| Break Text | Text stops above and continues below the image. Nothing beside it. | Full-width images or charts |
| Behind Text | Image sits behind the text layer. | Watermarks, background graphics |
| In Front of Text | Image floats over text, covering it. | Decorative overlays, annotations |
How Do You Wrap Text Around an Image in Google Docs?
Here is the step-by-step process to wrap text around any image in Google Docs. The same steps apply to drawings, charts, and other inserted objects.
Step 1: Insert Your Image
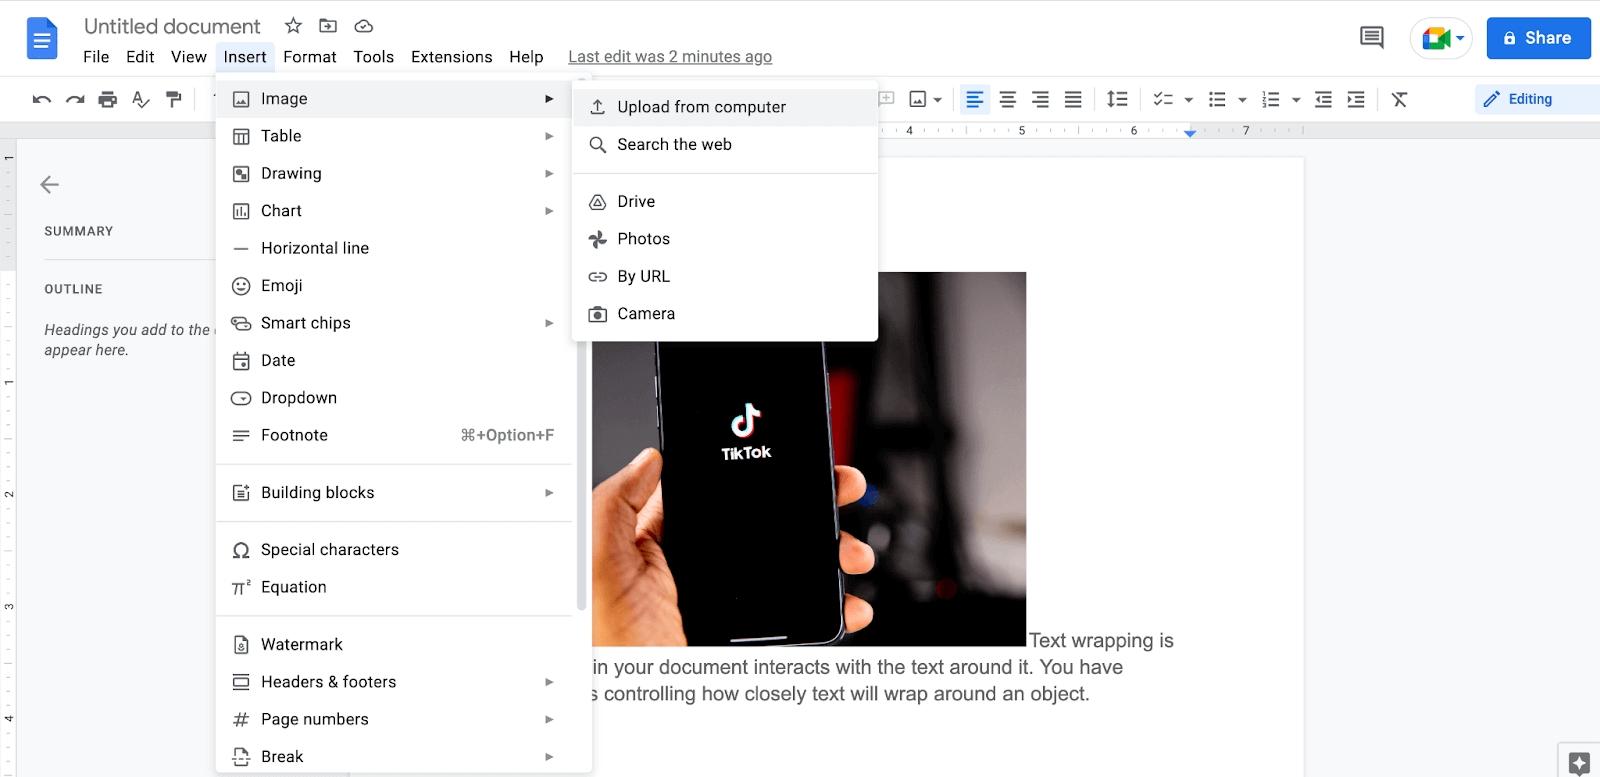
Click Insert > Image and choose your source — upload from computer, search the web, Google Drive, Photos, by URL, or camera. You can also paste an image directly with Ctrl + V (Windows) or Cmd + V (Mac).
Step 2: Select the Image and Choose Wrap Text
Click the image to select it — a blue border appears around it along with a floating toolbar directly below. Click the Wrap Text icon (second option, showing text lines flowing around a square).
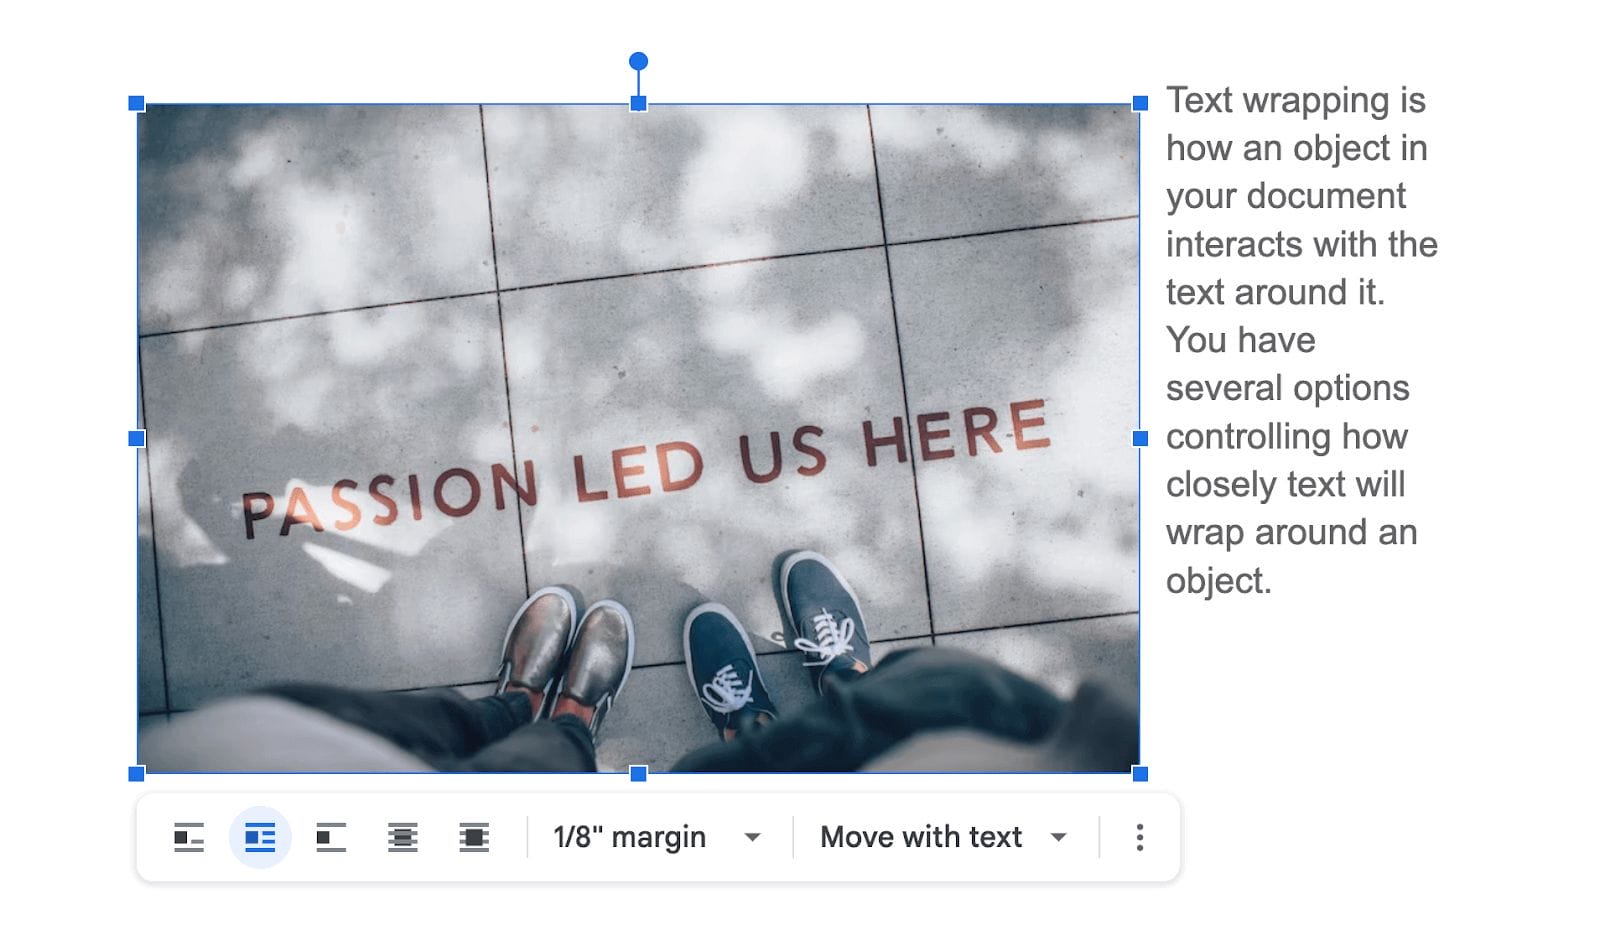
The text immediately reflows around the image. You can drag the image to reposition it anywhere on the page, and the surrounding text adjusts automatically.
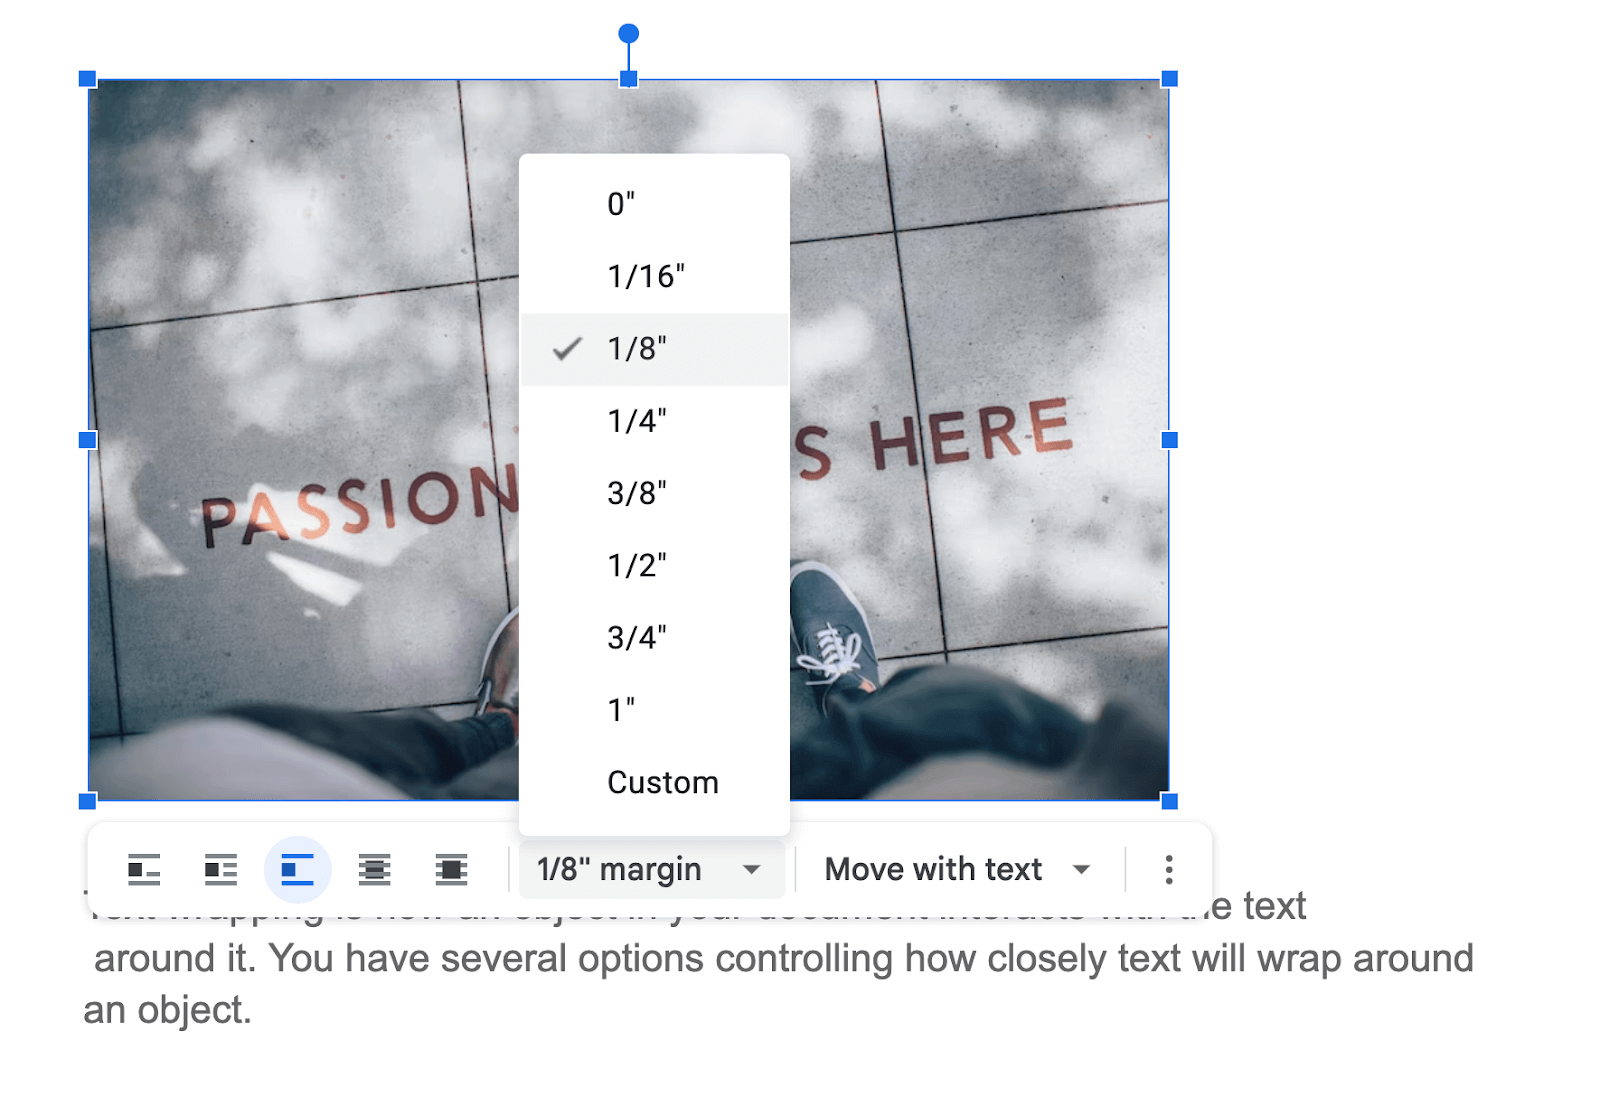
Step 3: Adjust the Margin Between Text and Image
By default, Google Docs adds a 1/8-inch (0.125″) margin between the image and surrounding text. To change this, click the image, then click the three-dot menu in the floating toolbar and select All image options. Under Text Wrapping, adjust the margin values to your preference.
Step 4: Fix the Image Position (Optional)
When wrapping is enabled, you can choose whether the image moves with surrounding text or stays anchored to a fixed spot on the page. Click the image, open All image options, and look under Position:
- Move with text — The image stays attached to the paragraph above it. As you add or remove content, the image shifts along with it.
- Fix position on page — The image stays exactly where you placed it. New text flows around it without moving it.
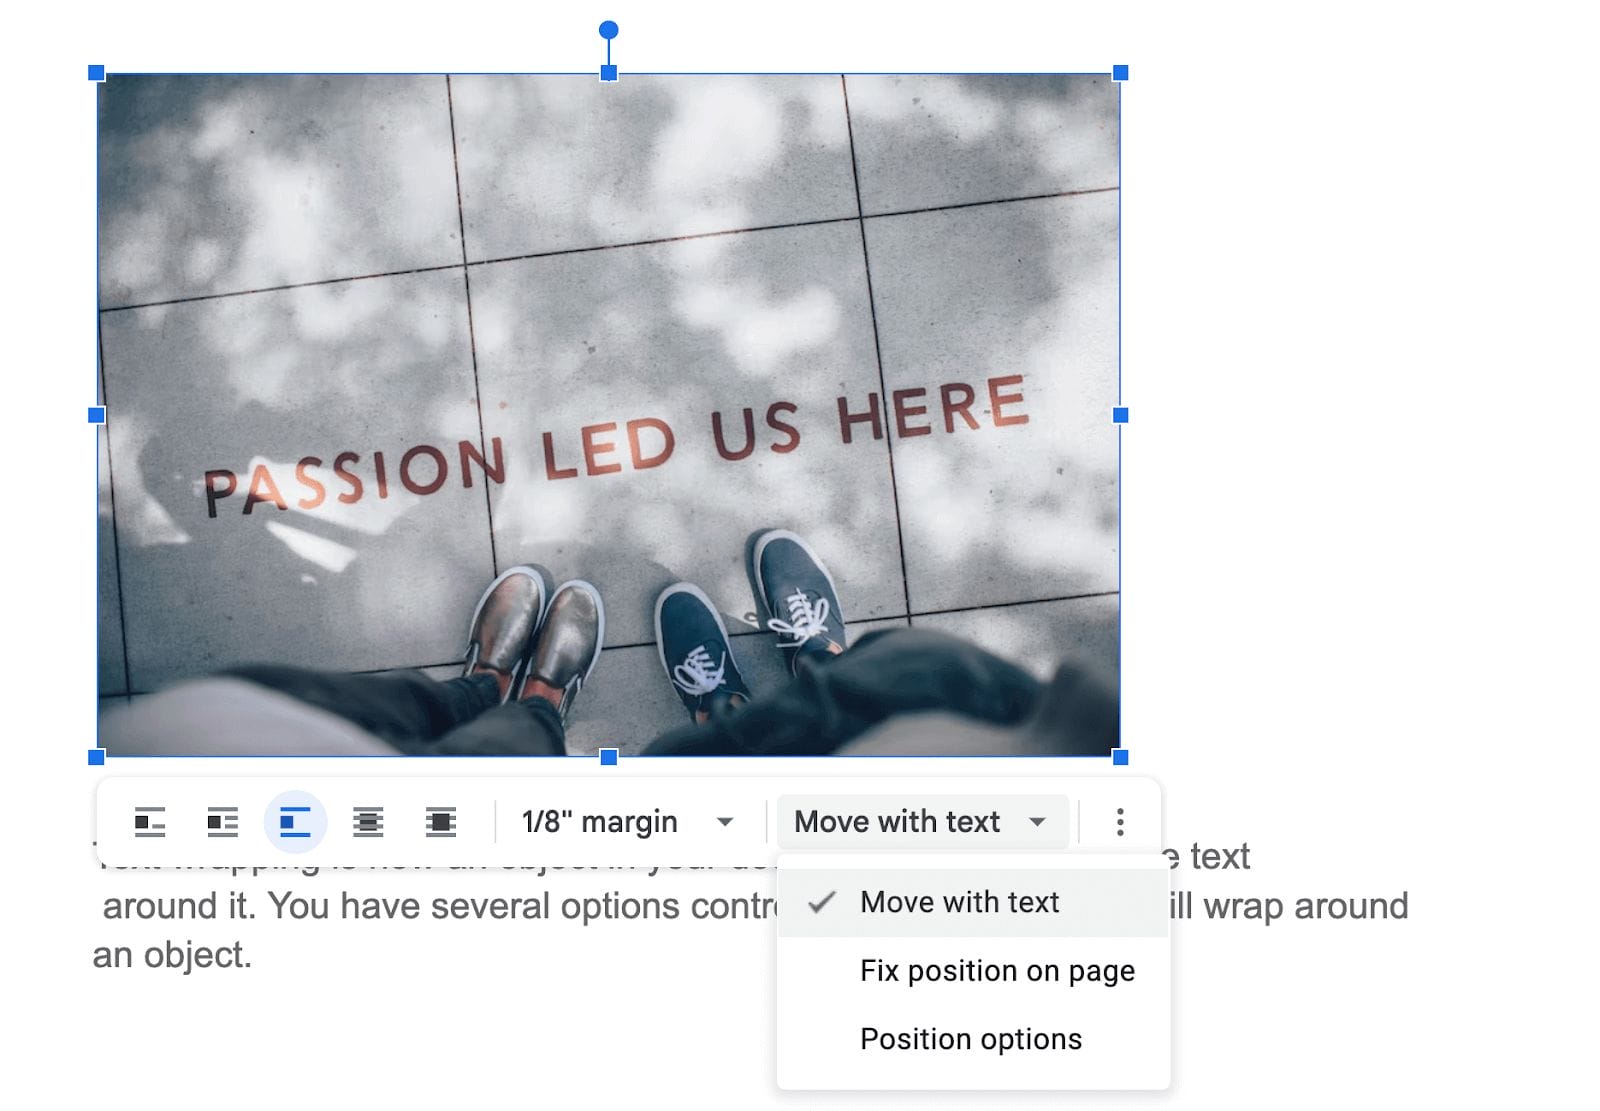
For most documents, Move with text is the safer choice. It prevents the image from ending up on the wrong page as your document grows.
Keyboard Shortcuts for Text Wrapping
| Action | Windows | Mac |
|---|---|---|
| Open text wrapping menu (Google Sheets) | Alt + O, then W | Ctrl + Option + O, then W |
| Manual line break inside a cell | Alt + Enter | Ctrl + Enter |
| Wrapping menu via compatible shortcuts | Alt + H, then W | Not available |
The Alt + H, W shortcut only works if you have Enable compatible spreadsheet shortcuts turned on in Google Sheets under Help > Keyboard shortcuts. Google Docs does not have a dedicated keyboard shortcut for image text wrapping — clicking the image and using the floating toolbar is the fastest approach.
Frequently Asked Questions
Can you set text wrapping as the default for all cells in Google Sheets?
Yes. Select all cells with Ctrl + A, then apply Wrap from the toolbar or Format menu. This sets wrapping for every cell in that sheet. New sheets will still default to Overflow, so you need to repeat this step for each new sheet you create.
Does text wrapping work in merged cells?
Yes. Select the merged cell and apply text wrapping normally through the toolbar or Format menu. The wrapped text respects the combined width of the merged cells.
Can you wrap text around a table in Google Docs?
No. As of February 2026, Google Docs does not support text wrapping around tables. Tables always use the Break Text layout — text appears above and below the table but not beside it.
What is the difference between text wrapping and word wrapping?
In Google Sheets, they mean the same thing — fitting text within a cell boundary. In Google Docs, text wrapping specifically refers to flowing text around images and objects, while word wrapping is the automatic line-breaking that happens at page margins.
Why does wrapped text look cut off when I print from Google Sheets?
The print layout uses fixed row heights that may not match the screen display. Before printing, go to File > Print and check the preview. Adjust column widths or use Fit to width under Scale to ensure wrapped text appears fully on the printed page.
Summing Up!
In Google Sheets, text wrapping keeps your data readable by fitting content within cells instead of letting it overflow or get clipped. Use the toolbar icon for the fastest access — select your cells, click the wrapping icon, and choose Wrap. On mobile, tap the Format button, go to Cell, and toggle Wrap text on.
In Google Docs, text wrapping controls how content flows around images. Click any image, select Wrap Text from the floating toolbar, and adjust margins if needed. For most documents, Wrap Text with “Move with text” positioning gives the cleanest result.
If you work with Google Docs regularly, you might also find our guides on saving images from Google Docs and creating book templates in Google Docs helpful. And if you are tracking data in Google Sheets, check out our guide to the best digital marketing tools for streamlining your workflow.
Got a text wrapping tip I missed? Share it in the comments below!
Last updated: February 24, 2026