
TL;DR: The fastest way to convert a WordPress post to a page is with the free Post Type Switcher plugin — open the post, change the “Post Type” dropdown to “Page,” and save. No content is lost. For developers, a single WP-CLI command (wp post update 123 --post_type=page) does the same thing instantly via terminal. WordPress still has no built-in post type switcher as of version 6.7.
When Should You Convert a Post to a Page?
Posts and pages serve different purposes in WordPress. Posts are time-based entries (blog articles, news) that show up in your feed and have categories, tags, and comments. Pages are static, timeless content (About, Contact, Services) that don’t appear in your blog feed.
Here are the most common reasons I’ve seen for converting a post into a page:
- Evergreen content — a tutorial or resource that doesn’t belong in a dated blog feed
- Site restructuring — moving a post into your site’s permanent navigation
- Landing pages — turning a high-performing post into a standalone page with its own template
- Removing from blog feed — the content doesn’t fit your blog’s editorial direction anymore
Whatever the reason, the conversion itself takes less than a minute. All your content, featured image, and custom fields are preserved — only the post_type value changes in the database. If you’re curious about how WordPress stores this data, check out our guide on where WordPress posts and pages are stored.
Method 1: Using the Post Type Switcher Plugin (Easiest)
The Post Type Switcher plugin is the most popular solution with over 200,000 active installations. It’s free, lightweight, and maintained by a core WordPress contributor (John James Jacoby). It adds a single dropdown to the editor sidebar — no settings page, no bloat.
Step 1: Go to Plugins > Add New, search for “Post Type Switcher,” and click Install Now followed by Activate.

Step 2: Open the post you want to convert. In the block editor, look at the right sidebar under the Post tab. You’ll see a new Post Type option. Click it and select Page.
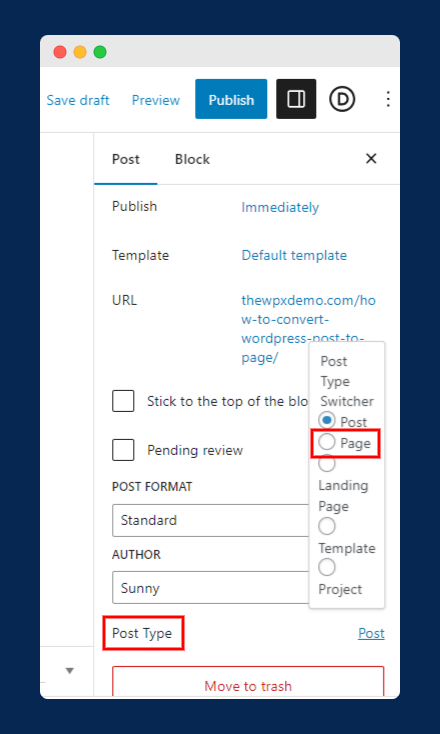
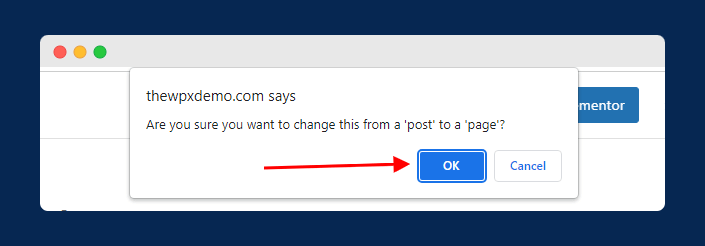
Step 3: A confirmation dialog will appear. Click OK, and WordPress will reload the editor as a page.
That’s it. Your post is now a page. All content, the featured image, and custom fields are preserved.
Bulk conversion: Post Type Switcher also works from the Posts > All Posts screen. Select multiple posts using the checkboxes, choose Edit from the Bulk Actions dropdown, click Apply, then change the Post Type to “Page” and click Update.
Method 2: Copy All Blocks Manually (No Plugin)
If you’d rather not install a plugin, WordPress’s block editor lets you copy all content from a post and paste it into a new page. This method works on both self-hosted WordPress and WordPress.com.
Step 1: Go to Posts > All Posts and open the post you want to convert.
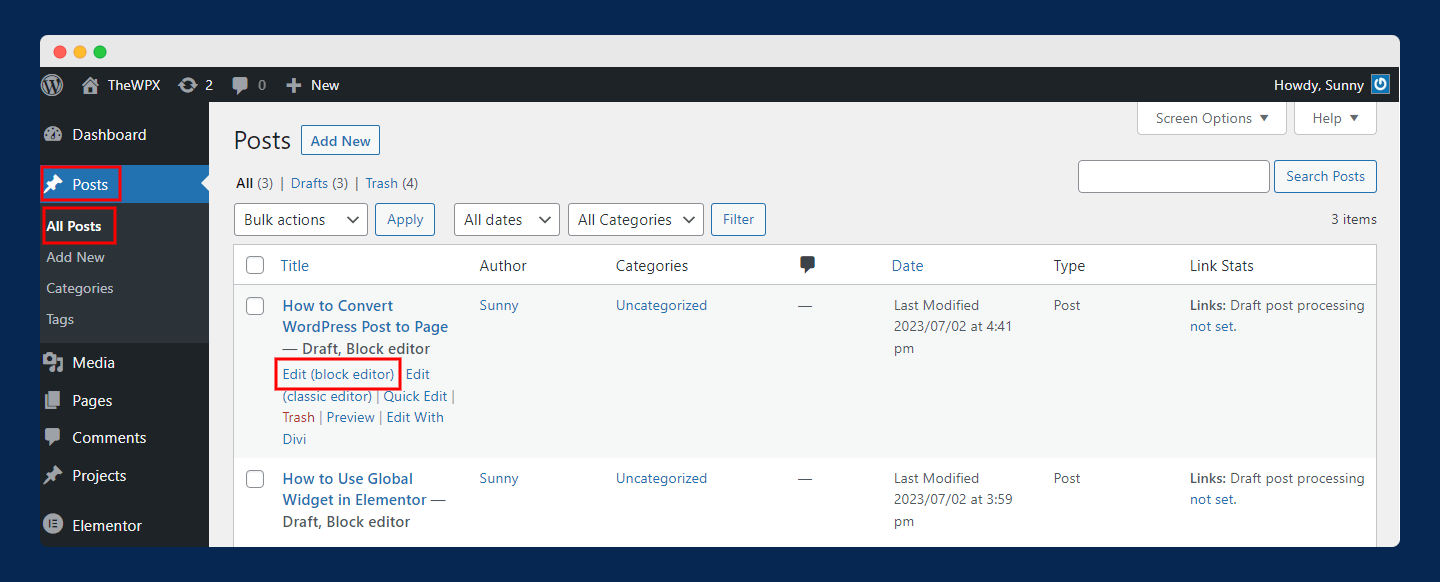
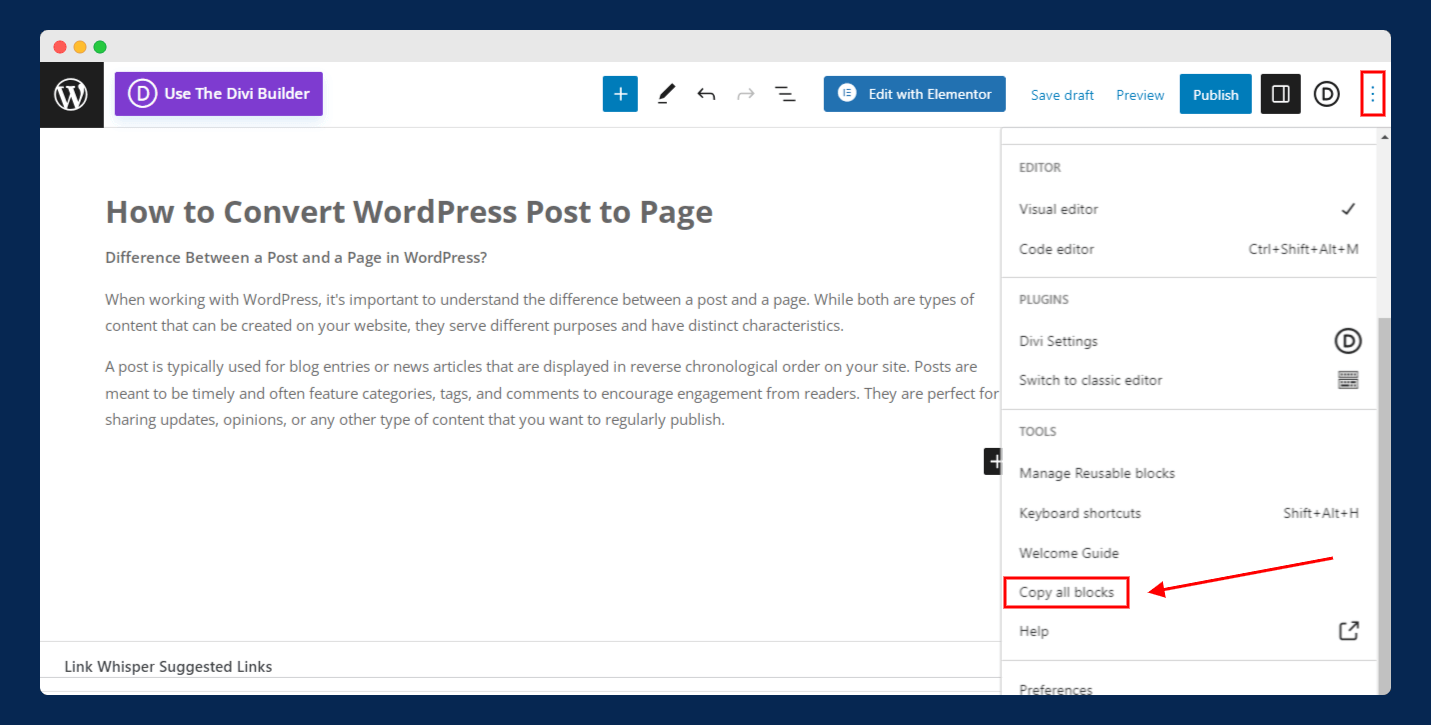
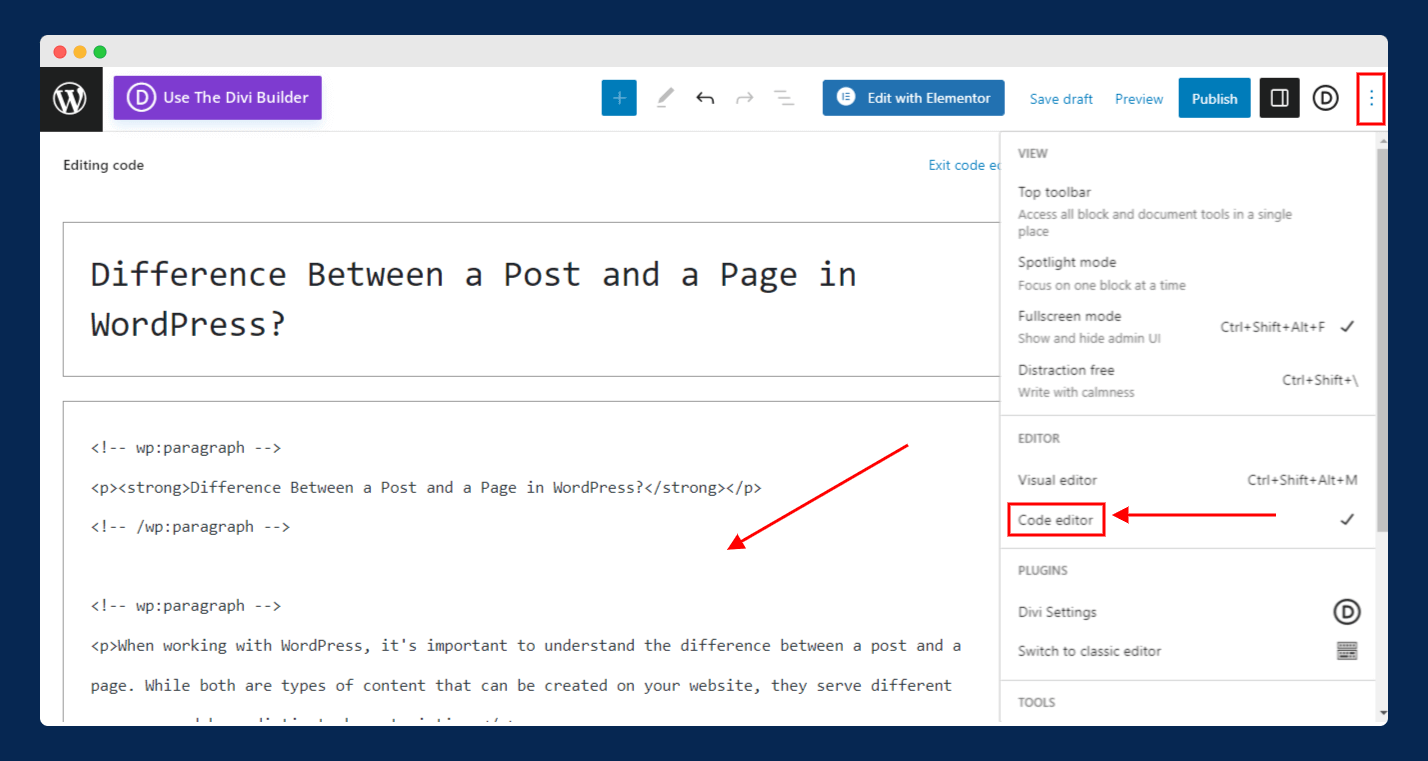
Step 2: Click the three-dot menu (top right corner) and select Copy all blocks under the Tools section.
Step 3: Navigate to Pages > Add New. Click the three-dot menu, switch to Code Editor, and paste the copied content using Ctrl+V (or Cmd+V on Mac). Then click Exit code editor to return to the visual editor.
Step 4: Manually add the title, featured image, slug, meta tags, and any other metadata. Then publish the page and set up a 301 redirect from the old post URL to the new page URL.
Why this method has limitations: It only copies the content blocks. Categories, tags, comments, publish date, featured image, and SEO metadata are NOT transferred. You’ll need to re-enter those manually and handle the redirect yourself. For a single post with minimal metadata, this works fine. For anything more, use the plugin method.
Method 3: Using WP-CLI (For Developers)
If you have SSH or terminal access to your server, WP-CLI is the fastest method. A single command converts any post to a page instantly.
Convert a single post:
wp post update 123 --post_type=pageReplace 123 with your actual post ID. You can find the post ID by hovering over the “Edit” link in Posts > All Posts — the number after post= in the URL is the ID.
Bulk convert all posts to pages:
wp post update $(wp post list --post_type=post --format=ids) --post_type=pageConvert specific posts by category:
wp post update $(wp post list --post_type=post --category_name=tutorials --format=ids) --post_type=pageWP-CLI preserves all metadata, featured images, and custom fields — just like the plugin method. The only difference is you’re doing it from the command line instead of the WordPress dashboard.
Which Method Should You Use?
| Method | Best For | Preserves Metadata? | Difficulty |
|---|---|---|---|
| Post Type Switcher | Most users — single or bulk conversion | Yes (everything) | Beginner |
| Copy All Blocks | WordPress.com users or one-off conversions | No (content only) | Beginner |
| WP-CLI | Developers, bulk operations, scripting | Yes (everything) | Advanced |
For most WordPress users, Post Type Switcher is the clear winner. It’s free, takes 30 seconds, preserves everything, and supports bulk operations from the post list screen.
What Happens After You Convert a Post to a Page?
The conversion itself is straightforward, but there are a few things you should check afterward. I’ve made the mistake of skipping these steps before, and it caused 404 errors and lost SEO value. Here’s what changes and what you need to do:
| What | What Happens | Action Needed |
|---|---|---|
| URL / Permalink | Changes from post permalink structure to page structure (e.g., /blog/post-slug/ becomes /post-slug/) | Set up a 301 redirect from the old URL to the new one |
| Categories & Tags | Data stays in the database, but pages don’t display them | No action needed — they’re just hidden |
| Comments | Existing comments are preserved in the database | Check Settings > Discussion to enable comments on pages if needed |
| Featured Image | Preserved — no change | None |
| SEO Metadata | Preserved (Rank Math, Yoast, etc. data stays intact) | Verify your SEO plugin still shows the correct title and description |
| Internal Links | Other posts linking to the old URL will break if the URL changes | Update internal links or rely on the 301 redirect |
The most important step is setting up a 301 redirect. If your post was indexed by Google, the old URL will return a 404 error after conversion (since the permalink structure changes). A 301 redirect passes the SEO value to the new URL and ensures visitors don’t land on a dead page. See our detailed guide on how to redirect a WordPress page for step-by-step instructions.
Frequently Asked Questions
Does WordPress have a built-in way to switch post types?
No. As of WordPress 6.7 (the latest stable release in February 2026), there is no native option to switch between post types in the block editor. You need a plugin like Post Type Switcher or a WP-CLI command to do this.
Will I lose my content when converting a post to a page?
No. When using Post Type Switcher or WP-CLI, all content, custom fields, featured images, and SEO metadata are preserved. The only change is the post_type field in the database. The manual copy-paste method (Method 2) only transfers block content — you’ll need to re-add metadata manually.
Can I convert a page back to a post?
Yes. The process works in both directions. In Post Type Switcher, select “Post” instead of “Page” from the dropdown. In WP-CLI, use wp post update 123 --post_type=post. The conversion is fully reversible.
Can I convert custom post types (like WooCommerce products)?
Yes. Post Type Switcher supports all registered post types, including custom ones like WooCommerce products, portfolio items, or testimonials. The same applies to WP-CLI — just replace page with whatever custom post type slug you need.
Do I need to set up redirects after converting?
Yes, if the converted post was published and indexed by search engines. WordPress posts and pages often use different permalink structures, so the URL changes after conversion. Set up a 301 redirect from the old post URL to the new page URL to preserve SEO value and avoid broken links. If you use Rank Math, it can auto-detect URL changes and create redirects for you.
Summing Up!
Converting a WordPress post to a page takes under a minute with the Post Type Switcher plugin. Install it, change the dropdown, and you’re done — all content and metadata stay intact. Developers can skip the plugin entirely and use a one-line WP-CLI command instead.
The one step most people forget: set up a 301 redirect from the old post URL to the new page URL. Without it, you’ll lose any SEO value the original post had and visitors will hit a 404 page.
Have questions about the conversion process? Drop them in the comments below!
Happy blogging!